Hello everyone! Today I want to continue the theme of crafts and show you how you can easily and quickly create wonderful toys in the form of paper snowflakes at home. The other day my sons and I made such a beauty that now this wonderful creation makes us happy. Watch and do with us.
I remember how I sat and cut out snowflakes as a child; it brought me so much joy and pleasure. And then she ran and glued it to the window. Time has passed, but nothing has changed until now, I still love this activity, only now I do them with my kids.
As always, I’ll start with the simplest manufacturing options, and along the way there will be more and more complex options.
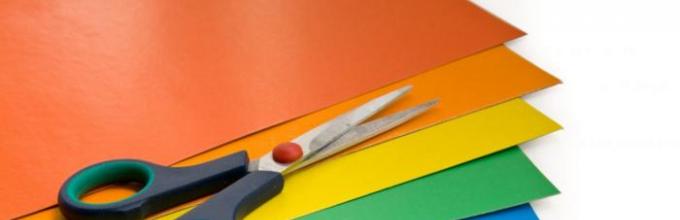
In order to create a snowflake, you only need one tool - scissors and a sheet of paper and a good mood.

Then you need to correctly fold the paper into a triangle, and then draw a suitable pattern and cut it out. You will also need a simple pencil))).
The main thing is to take a square-shaped sheet, fold it in half (1), then in half again (2), repeat steps (3, 4), almost done! Draw with a pencil what you will cut out, for example like this in this photo:

So, from this triangular blank I propose to make these magically beautiful and light versions of winter snowflakes, which you can use everywhere, even bring them to kindergarten, school and decorate rooms in your apartment, in the entrance and windows with them.
If you like everything openwork, then this look is just for you:

If you prefer classic options, then choose these wonderful snowflakes:

The following layouts and diagrams will be a little more complicated:

In general, I really liked this selection of all kinds of decorations on snowflakes, which I saw on the Internet:

Look how picturesque and patterned they are, it’s just super beautiful, and most importantly, it’s accessible to everyone, even a preschool child, a schoolchild, and even us adults.


For the little ones, you can offer this craft in the form of curls made from stripes.

Cutting snowflakes from napkins or paper
Have you ever seen those, such that the cutest snowflakes appear from napkins that absolutely everyone would like? I found these and am sharing them with you, the method is simple and easy, and also budget-friendly, you will need glue, napkins, scissors, a pencil or pen and cardboard.
Interesting! Napkins can be replaced with any other type of paper, such as corrugated paper.
The stages of work themselves are not complicated, but these pictures outline the entire sequence, so watch and repeat.
 The final result of the work will be incredibly beautiful and will be remembered by everyone, and if you decorate it with colored sequins or something like that, it will be absolutely cool.

Or this way, depending on how someone decides to decorate the original sample.

Well, now I’ll show you a rather primitive, old method; before, such cute snowflakes were used to do everything in labor lessons or in art kindergartens. You will need paper and a good mood, and of course, scissors and glue. You will need to cut long strips of paper from a regular A4 sheet, the width of the strip should be 1.5 cm and the length approximately 30 cm.

You can make these multi-colored stripes and you should get 12 plain stripes.


This is how you glue these strips together step by step.

It turned out incredibly original, you can hang it on a Christmas tree, on a window or on a chandelier))).

Another similar option made from paper strips.

I saw a friend’s snowflake made from ordinary newspaper, then you can cover it with shiny varnish or glue sackcloth.

Or you can roll cones out of paper and glue them in a circle, alternating colors.

Do-it-yourself volumetric snowflake with step-by-step descriptions
To begin with, I want to offer you this way of working, maybe you will like it better than the following:
This type of work is a little more complicated, but it is the most interesting in my opinion, because it looks Such a snowflake appears as if in 3D form. Of course, it’s time-consuming, but it’s worth it, my child and I made such a masterpiece in 1 hour. We are happy to share our step-by-step master class with you.

Stages of work:
1. You will need 6 squares of paper (blue and 6 of another white color), we took ordinary squares that we already had, they are sold as notes for notes. If you don't have these, then make your own.
Fold each square in half from one end to the other.

It will turn out something like this, and the last figure lies on the table, this is the result of the work.

2. Then fold the two ends of the paper to the fold line on both sides.

Turn the finished templates over to the wrong side.


Now turn the craft over to the other side again and stick out the parts that stick out.

4. This is how it should work out, it’s absolutely not difficult.

The next step will be to prepare 6 white squares, from which we will make the following blanks.

5. So let's start, this work is even easier than the previous one, let's make origami out of paper again.

This is how it should turn out, there should be 6 blue blanks, and also 6 white ones.

6. Well, after you have cut the white squares, fold each leaf in half by taking one end and placing it on the other.

Do it after the envelope.

7. Now turn all the envelopes over to the other side.

My youngest son also helped, and the eldest joined a little later.

8. Fold the sides.

Flip it over and fold out the sides, then fold them toward the center. Cut out a small circle from paper and attach all the modules.

9. Now start gluing.

Take your time, do everything carefully. Use a napkin.

10. Almost everything is ready, all that remains is to decorate and cheer up yourself and those around you.

So I called my eldest son for help, and this is what we did to him.

11. We glued a photo in the middle, it turned out to be such a funny and mischievous modular paper snowflake. Tomorrow we will hang this beauty on a booth in the kindergarten. It looks simply amazing and much brighter live). So be sure that absolutely everyone will like this miracle!

In fact, there are quite a lot of three-dimensional options; they can be made using the origami technique, or in the most ordinary way.
I found these on the Internet, I hope you find them useful, take paper, scissors and glue:

Here is another similar option.

If you have a lot of time, then you can make more complex voluminous snowflakes; I know that the halls of kindergartens, schools, universities, universities and even shops are usually decorated like this.
Interesting! You don't have to glue the parts together, but use a stapler to make it faster.


Video on how to cut out a New Year's paper snowflake for children
First I wanted to show you a primitive video, and then I thought that you can easily do the most ordinary thing yourself. So I thought, I thought and... I propose to cut out an unusual snowflake in the form of an angel:
Simple snowflake patterns for beginners in origami technique
As far as I know, origami is also divided into subtypes, for example, modular paper origami. Which one do you love the most? I have some interesting ideas.
Or the simplest and easiest to do, even school-age children can figure it out:

Modular origami is already more difficult, here you initially need to learn how to fold the modules correctly, and then everything will go like clockwork.

You will need to make quite a lot of modules to put together such a composition, but you will develop fine motor skills)))

Each such module is easily inserted one after another, so you can come up with any options on the go.

All I can do is wish you good luck and creative success.

Schemes and templates for cutting snowflakes from paper for the New Year
As for the various ready-made patterns, I offer you these types of snowflakes. The main thing is to remember that first you need to fold the sheet correctly, as I showed you at the very beginning
Now outline what you want to see and cut out along the contours.

If you want to make the snowflake more voluminous, use ready-made templates, like this one:

For this purpose, you will need to cut out 3-4 templates, and then stitch or glue them in the center, and press them down with a stapler. Who needs such ready-made blanks and diagrams, write a comment below, I will send it to you by email absolutely free, I have quite a lot of them in my piggy bank, I will be happy to share a whole bunch.


By the way, you can create your own pattern, look how it looks, try it, it’s a creative activity:


I once thought it was last year, and I imagined such beauty:

For those who like openwork and very complex options, although there is nothing complicated, I can suggest watching this video, by the way, in it, paper is folded differently, take a look, there is something to learn:
Master class on snowflakes in quilling style for beginners
This type of toy is quite difficult if you have never made it using such a well-known quilling technique. But this is at first glance, because the main thing is to understand the essence.
Even a beginner or a child can get the simplest diagram and snowflake:

And also this video will help you with this, everything is accessible and described and shown step by step. All you have to do is repeat all the actions after the presenter and you will get a masterpiece.
Snowflakes using the quilling technique, this one is stunningly beautiful and charming. Try it.
Well, I gave you a whole bunch of ideas for realizing the festive mood, decorate your house, apartment. It will look simply great, especially with your own hands, such crafts will always bring warmth and comfort to every heart))).

See you! Have a great day everyone, sunny mood! Come visit more often, join my contact group, write reviews and comments. Bye everyone!
Sincerely, Ekaterina Mantsurova
The most favorite holiday of the entire world is approaching - New Year! There is very little time left to thoroughly prepare for it - buy gifts, come up with “cute pranks”, decorate the interior properly...
There's a lot to do! Let's put off pranks and gifts for later, and let's get on with interior decorations - after all, you all know that, first of all, the New Year is felt thanks to all sorts of snowflakes, sparkles, garlands, balls, a Christmas tree - all the indispensable attributes of this cheerful world holiday.
And today we will deal with snowflakes! Yes, yes, yes - today our hands will learn to make snowflakes of all sizes and shapes, voluminous and flat, and EVEN - dancing balleine snowflakes!
Do-it-yourself voluminous snowflakes, photo
Let's first look at these, let's tune in to the right mood...

Did you like these holiday decorations? Now you and I will learn how to make all kinds of snowflakes with our own hands.

Let's start with simple options, and then move on to more complex ones, especially since there are such voluminous snowflakes that consist of many segments of flat snowflakes.
Simple paper snowflakes, templates
For flat snowflakes we will need tools and materials such as plain paper (white or blue) and scissors!

Simple paper snowflake template

Snowflake cutting patterns
Have you considered? Have you chosen your snowflake? You might as well get creative and come up with your own exclusive version! Involve your children in this fun and festive activity - you are guaranteed great pleasure!

Paper snowflakes templates
As for snowflakes, simply fold a square sheet of paper several times to form a triangle. Draw one of your favorite snow patterns on it and carefully cut out your snowflake using scissors! ALL! Even a baby can handle it, right?
How to make a three-dimensional snowflake - a ballerina out of paper?
We have already learned how to cut snowflakes from paper, now we will complicate our task a little and move on to making a three-dimensional, dancing snowflake. Attention - a dancing ballerina in a chic patterned tutu is at your service:

To make this beauty we will need:
- Paper;
- White cardboard;
- Templates for ballerina figures;
- Simple pencil;
- Scissors;
- Needle with thread.
Get your kids to make snowflakes, which in this case will play the role of openwork ballet tutus, while you do the preparations yourself!
If you have a printer, simply print out the templates that we offer to your attention, or select the silhouette you like from various ballet photographs on the Internet:

Carefully, so as not to cut off the outline of the figure, cut out the workpiece and transfer it to plain white paper (you can, however, also use thin cardboard). Attach the finished base to a sheet of white cardboard and trace the outline of the figure.

While you were “revitalizing” paper ballerinas, your talented and diligent child successfully created a great variety of all kinds of patterned snowflakes! It's time for our dancing beauties to try on new tutus!

We put a “tutu” on the dancing figure - a snowflake - the ballerina is ready!

We make voluminous snowflakes from paper with our own hands
Let's complicate the task a little more! Since you and I have already learned how to make flat snowflakes very well, now we can easily make two voluminous snowflakes consisting of several flat elements! Look at these photos and you will immediately understand everything:

To make these snowflakes we will need:
- Patience;
- Already cut out snowflakes of the same type;
- Glue.

The more segments, the fuller and rounder the snowflake will be.
We fold each segment in half and glue one half of one segment to the second half of the other segment. Yes, IMPORTANT - do not forget to coat the segments with glue and very accurately align all the reliefs! The more accurately you do this, the neater the snowflake will turn out, and therefore more beautiful!
Embossed 3D paper snowflake
Let's look at another interesting version of a snowflake, made from ten small individual flat snowflakes:

Prepare the following materials and tools:
- Stapler;
- 10 sheets of white paper (the larger the snowflake is planned to be, the thicker sheets of paper you will need);
- Simple pencil;
- Ribbon or thread;
- Scissors.
So, first we cut out these squares, measuring 10x10 cm, from ordinary white A4 sheets:


 I hope you haven’t forgotten exactly what pattern was drawn on the first snowflake? You will need to cut out 10 completely identical snowflakes! Not an easy task :)
When all the parts are ready, we move on to the next stage!
So, we take five snowflakes, lay them out in a circle on the table and use a stapler to fasten the corners together. You should end up with something like a snow wreath:

Repeat the entire procedure again with the remaining five snowflakes.
And now we proceed to the main procedure - adding volume to our snowflake by connecting the outer contours of the snow wreaths to each other. Please note that the snowflakes are combined, but only the outer parts of the snow wreath are connected with a stapler! The internal ones are being straightened out!

Look at what a wonderful three-dimensional snowflake we made with our own hands from paper - a sight for sore eyes! It just begs to be seen at the exhibition!
Let's also make this snowflake - it will add to your snow collection and fit perfectly into the New Year's interior:

To make it, one single sheet of white paper will be enough!
Please prepare for work:
- A sheet of white A4 paper;
- Scissors;
- Glue;
- Simple pencil;
- Eraser.
To begin with, from a rectangular sheet of white paper we will form a white square according to all the rules. For those who do not yet know how this is done, we suggest, without further ado, to look through the photographs and immediately learn everything:

The square is ready - fold it in half diagonally. Repeat this action again. As a result, you should end up with a triangle like this:

Draw these petals on the resulting triangle with a simple pencil. Cut them out and carefully erase all pencil marks with an eraser:


We turn all our attention to the middle parts of the petals of our blank. We need to carefully bend each middle part of the petal, grease the tip with glue and glue it to the center of the future snowflake.

The snowflake is ready, but you can improve it even more and give it even more volume. To do this, make another such beauty, go through all the manufacturing stages again. Glue the finished snowflake with its back sides like this:

Did you like the result?

Having considered a large number of options for snowflakes and having familiarized yourself with the master classes for making them, I think that you will quickly and confidently be able to prepare your home for the celebration! Don't forget to involve your family and close friends in this fun and creative activity! Remembering this adventure will make you laugh more than once on New Year's Eve - which means you will be in good spirits for the whole year!
What is it difficult to imagine the New Year without? Of course, bezels, Santa Claus, and for us, residents of northern latitudes, it is extremely difficult to imagine the New Year without snow and snowflakes! If you want to create a truly New Year's atmosphere in your home, then don't be lazy and decorate everything around with snowflakes. Snowflakes can be flat or voluminous, carved or not. In addition, it is worth abandoning the stereotype that you can only make a snowflake out of paper. This is not so, and in this article you will find more than 50 master classes on making snowflakes with your own hands from a variety of materials!
Well, do you want to turn your home into a fabulous snowy kingdom? Then let's go!
Paper snowflakes
Simple snowflakes for kids
#1 From paper strips
The simplest paper snowflake that can be made with preschool children. Pre-cut paper strips need to be glued together with a star, and then each strip should be decorated. Anything will be used: felt-tip pens, pencils, stickers, paints, etc.
#2 From handprints
Here is another simple and original way to make a snowflake with children. Cut out 6 handprints from paper. Then you cut out patterns on them, glue them together and decorate.

#3 From twisted paper strips
Here's another simple way to make a snowflake. Screw 6 paper strips onto felt-tip pens and leave for several hours. Then remove them and fasten them together with a stapler. Decorate the center with paper circles. The snowflake is ready!

Snowflake cutouts
When it comes to snowflake crafts, the first thing that comes to mind is cutouts. A white sheet of paper or napkin is folded into a triangle in a special way, and then an intricate pattern is cut out of the triangle. Afterwards the sheet unfolds and we get a patterned snowflake.

Without some experience, carving a truly carved snowflake is quite difficult. Therefore, you can look at our ideas for patterns, and after a few self-cut snowflakes, ideas will come to mind!


Volumetric snowflakes
Volumetric snowflakes look very beautiful, which can be made from plain paper. In terms of production, there is nothing complicated in such a craft. Just follow the master class and everything will work out!
#1 Volumetric geometric snowflake
To make such a snowflake you will need 6 identical paper rectangles. Fold the rectangle in half and make 4 cuts: two long and two short. And then look at the picture.

#2 Snowflake-flower
To make a flower snowflake, prepare 6 strips of paper. Roll each of them into a cone and secure with a stapler. Glue the cones with the tops to the base in the form of a circle, and place a bead in the center. The finished snowflake can be further decorated

#3 Origami
Here is a step-by-step master class on making snowflakes using the origami technique.

#4 Snowflake made from component parts
A voluminous snowflake made from component parts that has won the hearts of millions of people around the world. The craft is very simple to make, but looks very impressive. Try it too!

#5 Snowflake 3D
And another version of an unusual 3D snowflake, which is very simple to make, but looks no less impressive than the previous one.

#6 Snowflake-flower
And here is a step-by-step master class on making a flower snowflake. Watch and repeat.

#7 Snowflake made of stripes
And here is a variant of a voluminous snowflake made of narrow stripes. You will need 10 thin strips of equal length. Now place five strips in front of you on the table, and put the remaining five perpendicularly and thread them in a checkerboard pattern through the first five. The result should be a kind of wicker “rug”. Now we begin to connect the strips that are close to each other. To do this, first lubricate their ends with glue and then carefully fasten them together. As a result, you should get something resembling a leaf. Now, using the same scheme, we make a second snowflake and connect them: we glue the free strips of one snowflake into the petals of the other.

#8 Volumetric snowflake
And another diagram of a three-dimensional snowflake made of paper strips. The manufacturing scheme differs from the previous one only in details: the number of strips and the method of connecting them. All the nuances are clearly visible in the step-by-step master class.

#9 Composite snowflake
And one more MK.

#10 Snowflake medallion
You can make a voluminous snowflake medallion out of paper. Fold a rectangular sheet of paper like an accordion. Then draw a pattern on each accordion element and cut it out. Now the only thing left to do is connect the leaf into a ring and tie it with thread along the bottom edge. The craft is ready!

#11 Volumetric snowflake
And here is a simpler version of the previous snowflake. You can start with this MK, and then complicate it using the top option.

#12 Fluffy snowflake
And finally, a very simple tutorial for making a fluffy snowflake. Fold the sheet of paper according to the standard pattern, trim off the excess and cut the edges into thin strips. Repeat the procedure 2-3 times and glue the snowflakes together. Fast and beautiful!

You may be interested in:

Time runs inexorably forward and now white flies are flying outside the window, slowly falling to the ground and covering everything around with a snow-white fluffy blanket. However, despite the cold, my soul is warm and joyful. And all because suddenly appearing snowflakes herald the coming of the New Year. The most important holiday of the year is already very close, which means it’s time to think […]
Felt snowflakes
One of the most favorite materials for crafts among needlewomen is felt. And this choice is very justified. Felt makes cute crafts and toys. By the way, you can make a snowflake out of felt with your own hands. It can be an embroidered blank, a toy in the shape of a snowflake, or you can make a craft in the form of a Christmas ball with an embroidered snowflake. In general, at your discretion.

More felt crafts:

The New Year holidays are approaching, which means that very soon a forest guest will appear in almost every home in our country. Some people prefer to put up an artificial Christmas tree, some prefer to put up a real forest spruce from a Christmas market, and some even confine themselves to pine branches. However, this is not so important, because the most important feature of the New Year tree is the toys. Since ancient times, people in [...]
Snowflakes made from popsicle sticks
Healthy snowflakes are made from popsicle sticks. This craft is ideal for children's leisure time; older children will find it too easy. I think the essence of making snowflakes from ice cream sticks is clear even without our descriptions. The whole point here is decoration, and you can borrow ideas for decoration from us!
#1 Decor with thread

#2 Sequins, rhinestones and pompoms

#3 Colored tape, cotton balls, stickers

#4 Buttons

#5 Threads, tinsel and sequins

#6 Feathers and sparkles

#7 Giant snowflake made from popsicle sticks

#8 Multi-colored sequins

Snowflakes made of fluffy wire
Unusual snowflakes can be made from fluffy wire. Flexible twigs can be twisted together in different combinations, and the fluffy “coat” makes the craft voluminous, so you can do without additional decoration of the finished product.
#1 Wire only
A beautiful snowflake can only be made from wire. To do this, you will need twigs of different lengths: longer (for the base) and shorter (for decorating the rays). You can come up with your own design, but use our ideas for inspiration!

#2 Wire and beads
Having connected the wires in the shape of a star, put several beads on each beam, and so that they do not fall, twist the end of the wire.

#3 Fluffy wire and crystals
We make a snowflake from fluffy wire. Then we prepare a saline solution for growing crystals (you can buy it ready-made in the store). Next, lower the snowflake into the solution and wait. In a few days, crystals will grow on the snowflake blank. This is such an unusual craft, and also educational.

#4 Fuzzy wire and salt
We assemble a snowflake from fluffy wire, coat the finished product with glue and sprinkle with coarse salt. By the way, you can first mix the salt for the craft with silver or white sparkles, then the snowflake will shimmer in the light, just like a real one.

Snowflakes made from cotton swabs
And here is another option for crafts for creative needlewomen - snowflakes made from cotton swabs. When your baby needs to be occupied and there is nothing left for creative materials, it’s time to look for an alternative.
#1 Sticks and stickers

#2 Application

#3 More ideas for snowflake shapes for applique


Snowflakes from drinking straws
You can make a snowflake from drinking straws. The tubes play the role of rays, and you can make additional structural elements from other materials.
#1 Tubes and paper
For example, an additional design element of a snowflake can be made of paper. Cut out two circles, glue tubes to one of them, and cover with the second on top. The top of the circles can be further decorated.

#2 Tubes and pasta
And here is an example of a snowflake made from a tube and pasta. A snowflake is made in the form of an applique. You can come up with combinations of elements in the diagram yourself. By the way, you can safely do this craft with kids, they will be delighted!

By the way, you can only make snowflakes from pasta. They make great crafts if you get a little creative!


See more pasta crafts:

New Year's holidays are approaching, which means it's time to think about creating a festive atmosphere. You don’t have to use store-bought accessories for decoration. It's time to unleash your creativity and make original crafts with your own hands. If you are one of those people who are creative about once a year, then New Year’s crafts from [...]
Snowflakes from clothespins
If you have unnecessary clothespins in your home that have been hanging around idle for several years, then it's time to give them a new life! On the eve of the New Year holidays, absolutely everything goes into crafts, suitable for snowflakes and clothespins!
#1 Snowflake with bead
You can make such a snowflake from ordinary clothespins, decorated with beads, with your own hands. You need to remove the middle from the clothespins, then glue the wooden bases with the back side, fold them with an asterisk (secured with glue), and then paint and decorate with beads.

#2 Composite snowflake
And for this craft you will need clothespins of different sizes. Make two snowflakes: a larger one and a smaller one, and then glue them on top of each other with a slight offset, so that the rays of one star are in the spaces between the rays of the other star.

#3 Shiny snowflake
And this snowflake is very similar to the first one, only the method of decoration is different. As you can see, you can decorate a snowflake made from clothespins exclusively with sparkles. It looks very cool and stylish, and most importantly, no one will ever guess that these are ordinary clothespins!

#4 And more ideas on the shape of snowflakes from clothespins
Here are a few ideas for making snowflakes from clothespins of different shapes. Take note and give your clothespins a new festive life.

#5 Another way to glue clothespins
If there are only six clothespins, then pay attention to the way they are glued together. It can be useful!

Snowflakes from toilet rolls
Original snowflake crafts can be made from toilet paper rolls. As a rule, the products turn out to be large and quite durable, so such a snowflake will decorate the Christmas tree or interior for many years!
#1 Prefabricated structure
A large snowflake made from ordinary toilet cylinders, decorated with sparkles. Cut the toilet sleeve into rings of the same size. Glue a flower out of six. Glue birds from other rings into each petal and insert them between the main petals along the ring. After the structure has completely dried, decorate it with sparkles.

#2 A la quilling
Making crafts using the quilling technique is difficult and painstaking work. A beautiful snowflake using the quilling technique can be made from toilet paper cylinders. You will find a step-by-step MK below.

#3 Big snowflake
Here's a big snowflake made from toilet rolls. The bushings are cut into rings of equal sizes, and then glued together in the shape of an asterisk. The finished product can be decorated with paints and sparkles.

#4 Another big snowflake
And another version of a big snowflake. In general, it’s up to you to decide how exactly to glue the rings, in what order and according to what pattern. You can easily come up with your own unique snowflake from toilet paper rolls. Our MKs are designed only to inspire you to come up with cool ideas!

More toilet roll crafts:

The New Year holidays are approaching, there is less and less time left, and there are more and more worries and hassles in preparing for the holiday! It is especially difficult for mothers during these pre-holiday days. Little fidgets are looking forward to the holiday, so mothers have to come up with interesting games and activities every day. If your imagination no longer works, our cool master classes on making New Year’s crafts from […]
Beaded snowflakes
Difficulties do not frighten real needlewomen, but on the contrary, they provoke and spark interest. Easy snowflake crafts for wimps! A true creator wants complexity and sophistication. If you are one of these people, then you definitely need to make a snowflake from beads!
#1 Snowflake two-color
You can weave snowflakes of the most unusual shapes from beads, but we will start, perhaps, with the simplest one. For training, so to speak. The detailed diagram is presented below. Explore and try! You can come up with the combination of colors and their order yourself.

#2 Beads and bicones
But here is a slightly more complex design, in which, in addition to beads, beads in the shape of two folded cones are used - bicones. The step-by-step master class is described below.

#3 Beads and round beads
And here is a snowflake made of round beads in combination with beads. You can choose the color arrangement yourself, and see the picture for a step-by-step scheme for making a snowflake.

#4 Beads and bicones
And here is another pattern for weaving snowflakes from beads. Please note that in addition to beads, this product also contains beads of another shape - bicones. Instead of bicones, you can use round beads, cathedral beads, barrel beads, etc.

#5 Beads, bicone and bugles
To make these snowflakes you will need: beads, bicone and glass beads. You, of course, can use beads of other shapes, but in any case, follow the pattern, then the snowflakes will turn out to be truly curly.

#6 Beads, bicone and round beads
To make such a snowflake you will need not only beads, but also beads of other shapes: round and bicone. You will find a step-by-step weaving diagram below.

#7 Bead embroidery
You can not only weave with beads, you can also embroider with beads. An excellent example of bead embroidery is a snowflake. You will need a felt flower, each of the petals of which will be embroidered with beads. The center can be decorated with a button, bead or glass bead.

See more bead craft ideas:

On New Year's Eve, craftswomen especially want to create. After all, this holiday is a real storehouse of inspiration; many festive ideas are spinning in your head, full of the desire to recreate a winter fairy tale. A little craftsmanship and imagination will help bring the festive atmosphere into reality. You can create real masterpieces from small glass beads. In this article we have collected for you more than 50 schemes and master classes [...]
Snowflakes made from wooden corks
Wooden corks can be used as improvised materials for making snowflakes. Although, this idea would be more suitable for restaurant owners or people who drink a lot of wine! In any case, take note, maybe you’ll be collecting corks all year (for example, I’ve been collecting toilet paper rolls all year :)) in order to make such an unusual craft by next year.

More ideas
The ideas for making snowflakes don’t end there. You can make a winter craft from any available materials, you just need to use your imagination a little and success is guaranteed. Here are some more original ideas for making DIY Snowflake crafts.
#1 Bead applique
A snowflake can be made in the form of a painting. To do this, take plywood of a suitable size and cover it with fabric or tape. Applique a snowflake from beads on top of the finished “canvas”. The craft is ready and looks very impressive!

#2 From candies
Another original idea for a snowflake is to make a craft from candies. For this design you will need New Year's candy canes in the form of a cane. Glue them according to the MK template below. Such a snowflake will not only please the eye, but also the taste buds!

#3 Cotton balls
If you want to make a New Year's snowflake craft with your kids, then take note of this master class. By the way, grandparents will appreciate such a gift. For this craft you will need: cotton balls, PVA glue, a sheet of colored paper.

#4 Candy wrappers
This idea is suitable for those with a sweet tooth. There are still benefits from sweets! You can make wonderful snowflakes from wrappers. The wrapper needs to be folded in four and then cut out into an intricate pattern. You can decorate your interior, Christmas tree, and even gifts with these snowflakes.

#5 Plastic bottles
Well, this idea will fit perfectly into the interior of those who care about the environment. You can make wonderful snowflakes from plastic bottles, which will become an excellent element of New Year's decor. Cut off the bottom and paint it with paints. The snowflakes are ready, and most importantly, the bottles do not pollute the environment and are pleasing to the eye!

#6 Crispy sticks
Who didn't eat snowflakes as a child? I think there are no such people! Well, since the kids eat them anyway, we need to make some delicious snowflakes for them! You will need crispy sticks (salted or unsalted), white chocolate and decorative sprinkles.

#7 Mosaic details
It's hard to find a child who doesn't have a mosaic. And it’s even more difficult to find a child who has all the details in the mosaic. They are always going somewhere. Well, if you have a set in which there are not enough parts and assembling the picture is not interesting, do not rush to throw it away. From the remaining parts you can make a New Year's snowflake. Well, shall we create?

#8 Thread and paper plate
You can also make snowflakes from ordinary paper or plastic plates. By the way, even kids can cope with such a craft, but mother’s help will, of course, be needed. You will find a step-by-step MK below.

#9 Salty dough
Another available material from which you can make a snowflake with your own hands is salt dough. Make the dough (1 tbsp salt, 1 tbsp water, 1 tbsp flour), roll it out, cut out snowflakes, and then decorate them. Dough snowflakes can be painted, covered with glitter, beads, or left just white.

#10 Eco snowflake
Lovers of eco-decor can make a snowflake from twigs. You can find sticks on the street or in the forest. All that remains is to come up with a pattern and glue the sticks together. Good luck!

#11 Wax drawing
Here is another version of a snowflake for creativity with children. You will need a sheet of paper, a candle, and watercolors. Use a candle to draw a snowflake on paper, and then paint the sheet with paints. In those places on the sheet where the wax remains, the paint will spread and the result will be an unusual pattern, just like Frost paints on the windows on a frosty day.
Help us improve: if you notice an error, select a fragment and click Ctrl+Enter.
What is it difficult to imagine the New Year without? That's right, without the corresponding decorative elements, the main ones of which are snowflakes. And our collection of paper snowflakes is constantly growing! Surely you have all already seen and know how to make such light ones:
Winter is the most creative time of the year! Yes, yes, don't be surprised. If you count how many cards, various crafts, decorations, gifts and snowflakes are made in the world (this is not counting the production of snow in the clouds), then this entire huge set will more than cover other pre-holiday preparations! And every year I want to do something new, original and pleasing to the eye. If you are looking for such an idea, then you are on the right track. Moreover, 2019 is coming to an end.
We propose to make new voluminous paper snowflakes - many step-by-step master classes, step by step, diagrams and various photos of ideas for the New Year 2020! If you have your own original ideas for snowflakes, send them to our New Year’s party using the form at the bottom of this article.
New video on how to make beautiful voluminous openwork snowflakes:
Snowflakes from openwork napkins
Openwork paper napkins can be an excellent material for creating New Year's crafts. After all, you can make a variety of snowflakes from them. 2 MKs on openwork snowflakes from Marina.
We show one of the options for creating such New Year's decor in this new master class for 2019.


First, fold the white openwork napkin in half. Then cut along the marked fold line with scissors. Next, each half needs to be cut in half. As a result, we got an openwork napkin, cut into 4 equal parts.

Now from these quarters we will make rays for the future snowflake. To do this, first fold the workpiece in half, marking the fold line.

Focusing on this line, we bend half of the openwork part.

Then we bend the second openwork half symmetrically.


By bending both sides, we get a blank for the first ray of a snowflake.

This is what it looks like from the front.

We continue to make other rays using the same principle.


And so we continue to work.

In order to make a snowflake, we needed 10 rays. If desired, the center can be decorated with a shiny rhinestone. We made such a New Year's snowflake from openwork napkins.

Now we propose to make a convex round snowflake from openwork napkins according to the 2018 master class. Very light and beautiful, suitable for children, see detailed instructions.

To create such a snowflake we prepared:
- openwork napkins (6 pieces are enough);
- scissors;
- glue;
- decorative rhinestone for the middle.

We will make the snowflake itself from peculiar little bags. To create them, we first need to bend the openwork napkin in half. After that, cut it with scissors along the fold line.

Then fold each half in half again and cut. As a result, we get 4 blanks from one napkin.

Now let's use glue and connect the edges of this workpiece so that we get a little bag.

In total, our snowflake will require 12 of these bags.
We take another napkin, it will serve as the basis for our snowflake. First glue 2 bags on it opposite each other.

Then we fix 2 more blanks in the other direction.

After this, evenly distribute the remaining bags and glue them onto an openwork napkin.

For the middle of the snowflake we will use other blanks. To create them, just cut a napkin in half.

After this, we immediately make small bags from the halves of openwork napkins.

In total we produce 4 such blanks.
We begin to glue them into the middle of the snowflake.

Fix all 4 bags evenly.

And we decorate the middle with decorative rhinestones. Our snowflake made from openwork napkins is ready.
Lush volumetric snowflake
Having 3 squares of paper, we can make the New Year's snowflake shown in this master class by Marina.
 To create it, let's take:
- 3 squares of blue paper;
- PVA glue;
- decorative rhinestone.
 Our craft consists of three elements, each of which will require one square blank. Let's start working on creating the first element. To do this, mark the transverse folds on the first blue square.
 After this, fold the side edges of the square to the middle line.
 Now let's fold the other sides.
 We unfold one side as follows, giving it the appearance of a trapezoid.
 We do the same on the other side.
 Now the corners of the resulting workpiece need to be carefully straightened so that they acquire a square shape.
 We do this with all four corners.

In place of these squares we make folds on both sides.
 Next, we will straighten these folds and give the workpiece itself the appearance of an elongated rhombus.
 We must make such diamonds from all four corners.
 The resulting diamonds need to be narrowed a little more; to do this, we make folds on the sides.
 The workpiece acquired this appearance after the folds were made.
 It remains to fold it as follows. To do this, you need to turn the workpiece over to the other side and make folds along the transverse folds.
 This is what this blank looks like from the other side.
 From the remaining two squares we make similar blanks, and then glue them together.
 And in the center of the craft we place a decorative rhinestone. It turned out to be such a voluminous snowflake.

Snowflakes curls


Simple strips of paper are used to create basic elements that can be glued together in any order. The number of options for such snowflakes tends to infinity, as in nature :)
A simple snowflake using the false quilling technique
Our master class on creating an openwork snowflake using the false quilling technique will help you make a decoration from strips of paper with minimal time and materials.

For the creative process you need to prepare the following materials:
- a sheet of white (or double-sided blue, silver) A4 paper;
- simple pencil;
- ruler;
- eraser;
- glue;
- scissors.
How to make an openwork snowflake using the unusual “false quilling” technique
The snowflake will consist of three types of elements, to create which you will need strips 1 cm wide. Each type of element must consist of six parts, so we need to draw a sheet of 18 stripes. The first 6 stripes should take up the length of the entire sheet. Draw the next 6 stripes perpendicular to the first. Draw the third type of stripes under the long ones, starting from the perpendicular stripes.
 Cut strips of paper and fold them into three rows, depending on their length. In places where pencil lines are very visible, use an eraser.
 To make it more convenient to work with strips, wrap them around a pencil and remove. Unlike the “” technique, our task is somewhat simplified, since we will not be working with dense curls, but with their similarity.
 Take a strip from the “short” row. To wrap the strip into a ring, twist it around your finger, close the edges and glue it. Make the next turn a little weaker and glue it again at the base. Make a third turn in this manner. Trim off the excess paper with scissors.
Do this with the remaining five short strips, making sure they are the same size.
 Make exactly the same ring curls with stripes from the middle row.
 Bend the longest strips in half.
 Wind each end tightly onto a pencil and carefully remove the ring - you will get these double curls.

 Press the smallest curl rings on both sides with your fingers, giving them an almond shape.
 Press the middle curl rings from the ends to the center to form a figure of a four-pointed star (diamond).
 Let's start collecting snowflakes. Connect the six almond-shaped parts together with glue. You will get something like a flower.
 Glue double curls between the “petals”.
 For convenience, glue double curls through one petal.
 Then glue on the remaining double curls.
 Glue the “stars” where the double curls meet.
 That's all, the voluminous openwork snowflake is ready!
Look how twisted it is, like lace!
Thanks to the three-dimensional elements, folding such a snowflake is easier than when creating a quilling figure. Even small children can cope with such creative work if they are shown everything and helped, if necessary. Older children will figure out the intricacies of the work on their own. You can also come up with other elements and make several snowflakes to decorate a festive tree or interior. The main thing is desire, and everything will work out for you!
Snowflake made of paper squares

What to prepare to create snowflakes from paper squares:
- squares 8*8 cm, cut from decorative double-sided colored paper (scrap paper);
- scissors;
- pencil;
- glue;
- rhinestones, sparkles, sequins.

How to fold unusual snowflakes from ordinary paper squares
To work, you need two squares of the same size. If you want to make small snowflakes, use small squares and vice versa.

Cut squares of the required size from decorative paper. It is best to use paper that has a pattern on one side and a base color on the other, then the snowflake will look original.
Fold the squares in half twice.

Straighten the squares, the main lines will appear on them.

Fold the edges to the center line, pressing the folds with your finger.

Do exactly the same on the other side. When you straighten the squares, you will see that markings of small squares have appeared on them.

Using scissors, cut along the center folds to the length of one square.

Fold the corners at each edge as shown in the picture.

Tape the corners so that the patterned side is on top.

Glue one part of the snowflake onto the other so that the rays do not overlap each other.

Decorate the resulting snowflake with self-adhesive rhinestones, or stick on glitter with glue.

A beautiful figured snowflake made of squares is ready!
So, with very little effort, we got an unusual snowflake. Such beauty was created from two squares, it’s hard to believe! You are convinced that children can handle this kind of work, which means you can make a lot of wonderful snowflakes and use them to decorate rooms, gifts for loved ones and relatives, a festive tree or a Christmas wreath. And if you connect several snowflakes, you can make a garland, pendants or a crown decoration for the holiday.
Volumetric snowflake made of foamiran
Our regular author Marina will show you how to make a shiny three-dimensional snowflake in her new master class.
Snowflakes can be made from various materials. In this master class we propose to make such a craft for the New Year 2019 from shiny foamiran. But you can choose colored paper, the folding technology is the same.

To make such a snowflake we prepared:
- shiny (glitter) foamiran of blue and silver color;
- scissors;
- toothpick;
- sharp knife;
- ruler;
- glue gun

Step-by-step instruction
We decided that our snowflake would be two-color, so we use foamiran in two colors - blue and silver. If desired, such a craft can be made in one color. The snowflake will consist of individual elements - rectangles. First, we cut out 3 rectangles measuring 2.5x14 cm from blue foamiran.

Now you need to make certain cuts on each rectangle. But first, let's use a ruler and a toothpick. On the wrong side, set aside 1 cm along the edges and draw small vertical lines with a toothpick. After this, the central part needs to be divided into 5 equal strips, the width of each of them will be 5 mm.

Next you will need a sharp utility knife. With its help, using a ruler, we carefully make cuts along the intended lines, not reaching 1 cm from each edge. This is best done under something hard (for example, a cutting board).

This is what our blue rectangle with cuts looks like, see photo:

We prepare other preparations in the same way. In total, 3 blue and 3 silver blanks will be used for our snowflake.

Now you can start creating the openwork rays of our snowflake. To do this, take one rectangle and carefully fold it in half, aligning the edges.


Using the same principle, we create the remaining shiny rays using a glue gun. There will be 6 of them in total.

For the base of the snowflake, cut out a small circle from silver foamiran. Glue the first blue ray to its wrong side.

We place the second (silver) ray opposite the first.

Now we fix the blue and silver rays between them using hot glue.

On the other side we also glue a couple of rays.

All that remains is to design the middle of our snowflake. To do this, cut out a small circle from silver foamiran and glue it.

Our voluminous snowflake made of shiny foamiran is ready.
Snowflake made from cardboard tubes
New Year's decor can be created even from scrap materials. An example would be a simple and interesting snowflake made from cardboard tubes, and the detailed process of its creation is shown in Marina’s master class. Such crafts can be done with children at home or in middle and senior groups of kindergarten.

To make such a snowflake we prepared:
- cardboard rolls from toilet paper or paper towels;
- ruler;
- pencil;
- brush;
- PVA glue;
- glitter;
- glue gun;
- scissors.

The first step is to make preparations for the future snowflake. We flatten the cardboard blank, and then make markings at a distance of 1 cm.


Then we need a glue gun, warm it up. He will help us connect 6 cardboard elements in a circle. This will be the base of our snowflake.

To create other elements of the snowflake, we must fold the cardboard strip in half.

In this way we add up the 12 remaining elements.


You should get 6 such blanks for a snowflake.

We begin to glue these blanks inside. We do this using a glue gun.

This is what our snowflake looks like at this stage.

All that remains is to decorate it and apply glitter. To do this, you first need to coat the top part of the craft with PVA glue; it is more convenient to do this with a brush.

Then pour glitter onto a sheet of paper.

Place the snowflake on this sheet with the coated side down. If necessary, glitter can be sprinkled on individual places. We made this snowflake from a cardboard tube.

Other options (photos and videos)
And more voluminous snowflakes from the Internet:


Original snowflakes made from strips of paper:
From voluminous snowflakes you can make beautiful garlands on the walls:
Form for submitting works to the competition
the best photos will be published in this article, their authors will receive diplomas for 1st, 2nd and 3rd place. The remaining authors (whose works have not been published) will receive diplomas from participants in the competition. Diplomas are sent for free, without payment or registration fees.
Before sending, please read and. Any questions you may have can be asked in the comments below the article.
Please carefully enter all the data that will be automatically inserted into the diplomas!
Openwork companions of winter. Traditional paper snowflakes - simple for preschoolers, more complex for adults. Unusual snowflakes - made from cotton swabs, twine, pompoms, satin ribbons, foil, salt dough and waste materials. Master classes on origami, quilling, weaving and dough making. Teachers advise how to make sparkling ice crystals - voluminous and flat. Fluffy snowflakes for windows, Christmas trees and ballerina snowflakes for interior decoration. Everything you need to create a New Year's snowy fairy tale in kindergarten and at home.
Magical winter miracle - snowflakes
Contained in sections:Includes sections:
Showing publications 1-10 of 578.
All sections | How to make a snowflake?
Material for making master – class: sets of paper for office equipment in blue and pink colors, hexagonal rosette image template snowflakes, a simple pencil, scissors, gouache paints, thin paint brushes, a glass of water. 1. At the preparatory stage...
 New Year is coming soon, you can start preparing New Year's decorations. Children over 6 years old will be happy to help adults. An exciting activity develops fine motor skills of the fingers, creative imagination and imagination. The desire to create beautiful original products with your own...
How to make a snowflake? - Master class “Volume snowflake - paper star”
Publication “Master class “Volume snowflake - an asterisk made of...”  Dear Colleagues! For the New Year, everyone is pleased to make some beautiful thing. to create a festive mood for your loved ones. To make one snowflake from paper, you need to prepare the following material: Plain office paper will require 5 sheets. From each...
 Image library "MAAM-pictures"
 When we cut out snowflakes from paper with our own hands easily and simply, we mostly use fairly traditional methods and patterns. As a rule, snowflakes are not particularly imaginative. But you really want to surprise with your craft! We tried to collect new schemes...
 Snowflakes made of paper for decoration. Snowflakes consist of twenty-one elements, each element of the snowflake is cut out separately, then the corners of the elements are glued and assembled into a circle, which is divided into seven sectors. The middle elements are put on the large ones and glued...
 The master class will be useful for educators, parents, and children of senior preschool age. We are all looking forward to the New Year. We prepare gifts, make decorations for the Christmas tree. Preparation creates a certain positive pre-holiday mood, and, as it were, stretches out this New Year...
How to make a snowflake? - Master class on making snowflakes from chenille wire. Part 1
 Recently, on the Internet, I came across an interesting option for making snowflakes without glue and scissors. I was wondering if I could make a fairly simple version of a snowflake. It turned out that it was really easy and fast, and most importantly, beautiful! This is how beautiful it turned out....
 After looking through the pages of the Internet, we decided to make an unusual New Year's decoration for the beauty of our home - a Christmas tree. Let's make gorgeous voluminous snowflakes with our own hands that will convey a winter fairy-tale atmosphere. Let's prepare - colored sheets, white and blue A 4, PVA glue,...


