First of all, let's define what we mean by the word broach. So, the point is that during the knitting process using this method you can decrease the loop. At the same time, there are plenty of types of loops in the simple art of knitting, and when creating this or that product, they can be combined, and as a result you can get a wide variety of patterns. In order for the patterns to come to life on the product, the number of loops is added or subtracted. At this moment, broaching helps, the thread passing between the loops and lying on the right knitting needle, and the loop on the left.
Instructions for knitting broaches
- First learn how to yarn over. To do this, bring the right knitting needle to the right under the working thread, to the left side of the index finger, and you should get a loop.
- If the intended design must contain beautiful patterns, then it is necessary to make a purl loop. To do this, in the next row you need to knit a purl loop over the yarn over, and then you will get a hole. This hole gives rise to large and beautiful openwork knitting.
Ways to knit a broach
There are several ways to knit a broach, but we will consider only three.
- In the first method, you need to knit two loops from one, thus increasing the required number of loops. Knit a loop behind the back wall of the previous row, but do not pull the loops off the needle. Then knit another loop in the same way without removing the loop from the knitting needle and yarn over. After this, knit the first loop to the new loop, but the back wall. Remove the hinges.
- The second method is distinguished by its simplicity. It is much lighter than the first one. Here you need to knit the first loop, and then knit the second loop without removing it from the knitting needle. Then pull the next loop through the first and remove it, you get a broach. In this broach, you can knit the yarn over differently. To do this, you need to place the right knitting needle under the working thread, from right to left, and knit a purl loop, so that the total number of loops increases.
- The third method is also quite easy. Here you need to remove the loop in the first row without knitting it. Then, in the second or subsequent row, purl over the stitch in the first row. With this weaving you will get a pattern with only two colors. The combination is quite simple and yet beautiful.
When experimenting with any of these methods of knitting a broach, you need to be sure that everything will turn out well!
More options for making broaches.
This is a variant of knitting a loop from the broach of the bottom row.
We continue to introduce you to the basic techniques of knitting. Today we’ll talk about ways to add loops.
Knitting one loop from a broach
The connection between two loops is the thread between the loop lying on the right needle and the loop lying on the left needle. This thread is called broaching.
Use the right knitting needle to grab the broach and transfer it to the left knitting needle. Knit the newly formed loop as a knit stitch or in accordance with the pattern described in the instructions.
Knitting one front crossed loop from a broach
Use the right knitting needle to grab the broach and transfer it to the left knitting needle. With the right knitting needle, grab it by the back wall and knit it with the front one.

Knitting one purl loop from the broach
Transfer the broach to the left knitting needle, with the worker lying in front of the work. Knit 1 purl stitch from the broach.

Adding one loop inside the fabric using a yarn over
One loop inside the fabric between two loops can be added using a yarn over: throw the working thread on the right knitting needle in the direction away from you. Yarn over like a regular loop. With this technique of adding loops, holes are formed on the canvas, creating the effect.
Yarn over the left needle and then knit it in the next row.

Adding one purl loop using a yarn over
Yarn over the left needle and then purl it.

Adding loops along the edge of the fabric
To give the knitted part the desired shape, loops are added on both edges. In this case, special techniques are used.
Adding stitches along the right edge
1. Insert the right needle into the edge loop, as in knitting, i.e. behind its back wall in the direction away from you. Pull the working thread through it, do not transfer the resulting loop to the right needle, but leave it on the left.
2. Using the left needle, grab the loop of the right needle away from you and transfer it to the left needle. Repeat steps 1 and 2 as many times as you need to add loops (Fig. 1).
Fig.1
3. On the added loops, knit in accordance with the pattern.

Adding stitches along the left edge
1. Lay the working thread around the large one towards you.
2. Using the right needle, grab the lower thread coming from the thumb (Fig. 2).
Rice. 2

3. Using the right needle, pick up the upper thread and pull through the loop. Then remove your thumb from the loop and tighten the thread on the knitting needle.
Thus a new loop was formed.
4. Repeat steps 1-3 as many times as needed to cast on stitches.

Based on materials from the magazine “Burda”
If you know how to knit, then you have probably encountered adding stitches. The ability to perform this technique is very important, since almost no knitted product can do without adding loops.
Not everyone knows how to add loops correctly and what methods exist for this. Many of the needlewomen do this in their usual way, without seeking advice from specialists. But in vain, since there are very convenient methods for adding loops, which they are not even aware of. Of course, experienced craftswomen cannot be baffled by such a question, but novice needlewomen quite often ask: “How to add loops when knitting?” We will be happy to answer this question. After all, having learned how to correctly perform this technique, you will be able to give the knitted product the desired shape and aesthetic appearance. Let's look at a few basic ways to add stitches.
The first method is to add loops from the broach
This method allows you not only to increase the number of loops in a row, but also to decorate the product.

Most often, adding loops from a broach is done in the center of the work. To add a loop from a broach, using a working knitting needle, you need to pick up the broach located between the two loops of the previous row and put it on the left knitting needle. But that is not all. Now we bring the right knitting needle under the front part of the loop and knit the front loop. As a result of this addition, neat holes appear on the knitted fabric, performing a decorative function.
Adding loops from a broach using the double-sided method
In principle, this type of addition is performed in a similar way to the above. Its implementation is possible both at the beginning of knitting and in the center.
For example, after knitting the first half of the fabric, using a working knitting needle, pick up the broach located between the just knitted and central loops. After this, place it on the left knitting needle and knit the front loop. Next comes knitting the central facial loop. Now we pick up the broach again and throw it onto the left knitting needle, and again knit it like a knit stitch.

This double-sided method of adding loops from a broach is quite simple to perform and helps in the decorative design of the product. The most common direction for this method of adding loops is Agree that such clothing models look more original. Having mastered this method, you will not only learn how to add stitches on knitting needles, but also learn how to knit things with
A variation of the method of adding from a broach - crossed version
This type of addition completely coincides with the first option. The only difference is that the front loop is knitted crossed. This option of adding is carried out in the center of the work. To do this, a working needle is inserted between two loops of the previous row to capture the broach. Now you need to transfer it to the left knitting needle, then insert the right one behind the back wall and knit a knitting stitch.
As a rule, this method is suitable for making reliefs on canvas, when it is necessary to preserve the overall design. This method can be used to knit, for example, darts.
Method of double-sided addition from crossed broach
Above we looked at a one-way method of adding loops from a broach. The method described now is similar in its execution to it. This addition is performed at the beginning of the row; it is this that gives the product the necessary shape and makes it beautiful in appearance.
We divide all the loops into two parts and determine the central loop. We knit the first part of the fabric with facial loops, then using a working knitting needle we catch the broach located between the two loops of the previous row and place it on the left knitting needle. Now, using the right knitting needle, we hook this broach behind the back wall and perform knitting. Next, we knit the central loop and again hook the broach using a working knitting needle, and perform crossed knitting.

How to evenly add loops along the edge of the fabric?
This type differs from the previous ones and is used if it is necessary to obtain a sufficiently dense edge of the canvas. Necks, sides and other parts of knitted products are usually knitted using this method.
The addition is made at the end of the row. To do this, you need to pick it up with a free knitting needle. Then, with a working knitting needle, you perform knitting with this edge, picking it up by the back wall. Next, perform edge knitting.
This method of adding allows for uniform addition along the entire edge of the product. This technique must be repeated on the next front row.
Adding from stitches of the previous row
This type of addition is made both at a certain point of the product and over the entire area of the knitted fabric. We will learn further how to add loops on the knitting needles in this way.
Having reached the place where it is necessary to increase, with a working knitting needle they pick up a loop from the previous row and knit it with the front one. Next, you need to knit the loop located above the one you just knitted, and then all the other loops on the knitting needle.

This method can also be used in the decorative design of a product.
How to correctly add loops along the edge of the fabric on the right and left?
This method is more suitable for knitting a neckline or armhole. Using it, you will get smooth, regular edges that will stretch less.
Increments are performed in the front row. To do this, use a knitting needle free from loops to pick up the first loop and knit it. Now this knitted loop needs to be transferred from the right to the left knitting needle and knitted again in the front way. The addition is carried out in this way until the required amount is reached.
This method can also be used when you need to increase several loops in a row.
Now let's learn how to add stitches on the needles along the left edge of the fabric. This technique will not cause you any difficulties, just like the previous method.
In this case, the additions are made at the end of the front row. Having finished knitting it, wrap the thumb with the working thread. Please note that its free end should be a continuation of the front wall of the resulting loop. Next, using a working knitting needle, they pick up the thread located closer to you, catch a section of the thread located further from you, after which the thread is lowered from the thumb and tightened on the knitting needle. It turns out to be a loop. In this way the required number of loops is added. Necks knitted in this way differ from others in their neatness and aesthetic appearance.
Now it will be easier for you to knit beautiful and unique things, because you know how to add stitches on your knitting needles.
Many lovers of such a process as knitting have encountered the need to be able to knit a broach, which is usually used to decrease stitches. In this master class we will tell you in more detail how to knit a broach in knitting.
The basic principles of knitting are quite simple, and the execution of certain patterns depends on the ability to decrease and add stitches. In this case, the ability to knit broaches will come to the rescue; this is when the thread is located between two loops and lies on the right knitting needle, and the loop on the left.
The very first thing to master the ability to do broaches is to master the yarn over technique. Knitting it is not at all difficult, just bring the knitting needle from your right hand under the working thread so that you get a loop on the knitting needle.
There are times when you can make a purl loop from the yarn over. This is done like this: in the row that comes after the yarn over, a purl loop is knitted over the yarn over to form a small hole, which is a small brick in the overall openwork pattern.
Now let’s move on to knitting a broach, which can be implemented in various ways.
In the first case, two loops are first knitted from one, as a result we get the necessary increase in loops. Next, you should knit a loop exactly behind the back wall of the previous row, but it does not need to be removed from the knitting needle. Repeat the same loop again and yarn over. Next, we knit the first loop to the new one, but through the front wall. Now the hinges can be removed.
In the second option, you will have to act a little more clearly. We start by knitting a knit stitch, and then knit the next one, too, but do not remove it from the knitting needle. But the next one needs to be dragged over the first one and removed from the knitting needle, thus creating a broach.
Another option is also not difficult. First, we remove one loop, which is located in the first row, but there is no need to knit it. And then in the next rows we knit with a purl loop that goes over the one removed in the previous row.
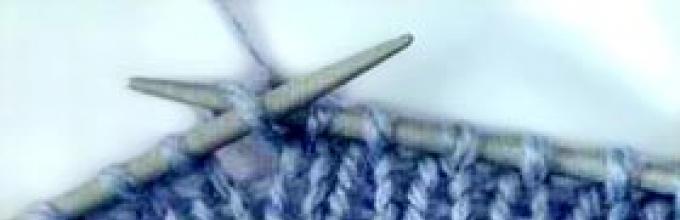
And here we show how to knit a loop if there is a broach in the row below.
Same option.


A more complex option is when jacquard patterns are knitted using yarn of several colors.

1. We knit 2 knit stitches together in different ways:
1.1. Knitting 2 knit stitches together with a tilt to the right
This refers to the inclination of the loops knitted together right To do this, the right knitting needle is inserted inside 2 loops on the left knitting needle, as when knitting loops, moving from left to right. On diagrams they are indicated by a triangle with sharp corners from “bottom left” to “top right”, or an oblique line from the lower left to the upper right corner.
to photo hosting →
1.2. Knitting 2 knit crossed stitches together with a tilt to the right
to photo hosting →
1.3. Knitting 2 knit stitches together with a tilt to the left (several ways)
:
a) "simple broach"
Not to be confused with broaching - a thread between adjacent loops in a row!
This means a method in which the upper loop obtained after knitting takes a tilted position left. On the diagrams they are indicated by a triangle with sharp corners at the bottom right and top left, or a line from the bottom right to the top left corner Simple broach
- way of knitting together two loops with a slant to the left: Slip 1 stitch as a knit stitch, knit the next stitch and pull it through the slipped loop. (Insert the right knitting needle inside the first of 2 loops from left to right, as when knitting a knit stitch, and remove this loop without knitting. Insert the right knitting needle into the 2nd loop from left to right and knit it. Both loops are on the right knitting needle. Now With the end of the left knitting needle, moving from left to right, pick up the removed (1st unknitted) loop on the right knitting needle and throw it to the left and through the second loop and through the end of the right knitting needle. That loop of the two that was knitted remains on the right knitting needle. which was removed, is now thrown over the knitted one. So it turned out to be a “broach” - they pulled the knitted loop into the removed loop.)
to photo hosting →to photo hosting →
b) "Method of rearranging loops" - slip the first loop on the right knitting needle as a knit stitch, without knitting, slip the second loop as a knitting stitch, without knitting, - in this case, both loops on the right knitting needle will be turned with their left bow forward like “grandmother’s” knitting needles,” then move from left to right with the left knitting needle inward of these two loops, return both loops in one movement to the left knitting needle; insert the right knitting needle into both removed loops inside, moving from right to left, as when knitting “grandmother’s” knit stitches, grab the thread and knit a knit stitch.
c) "2 faces crossed together"broach", aka - behind the back wall of the loops, aka crossed:
- insert the right knitting needle into two loops on the left knitting needle inward, moving from right to left, hook the working thread and knit 1 stitch. loop. The knitted loops will have a slant to the left with the base of the loops crossed, or like this:
to photo hosting →to photo hosting →.
2. We knit together 2 purl loops in different ways: Decrease in purl stitches in patterns that are also readable on the purl (even) side require a left or right position of the loop on the front side
2.1. "Purl 2 together"
- insert the right knitting needle inside 2 loops on the left knitting needle from right to left, hook the thread as when knitting a classic purl loop and purl both loops. On the front side we get the slope of the loop right
to photo hosting →
2.2. "Purl 2 crossed together"
, in this case we get the slope of the front loop on the front side of the work left
There are several ways to knit:
- insert the right knitting needle from the back of the fabric into both purl loops from left to right, grab the working thread and purl both loops.
- first we swap the loops, the 1st one towards you, the second away from you and put it on the left knitting needle; then we knit 2 cm. purl
- we knit a purl loop and return it to the left knitting needle, the working thread is in front of the work. Using the end of the right knitting needle (on top of the working thread), pick up the 2nd purl (which is to the left of the knitted one) with a movement from right to left inside the loop, throw this loop over the knitted one and the end of the left knitting needle with a clockwise movement - i.e., stretch the knitted loop inside without knitted loop. Transfer the loop to the right needle.
to photo hosting → to photo hosting →
3. We knit 3 knit stitches together in different ways:
in circuit descriptions it is often called “double pull”
, in this case, the loop obtained after decreasing can take the right, left or middle position, which in openwork patterns is of no small importance, because the slopes of the loops after making decreases are used to emphasize expressiveness
sides of openwork rhombuses, openwork triangles, leaves, etc. - by their tilt, these loops are precisely highlight, emphasize elements of openwork. This is especially clearly demonstrated in pattern 13 - if you do not observe the inclination of the loops, the pattern will not have a complete, neat outline (look). For example
to photo hosting →to photo hosting →
3.1. Knit 3 together (the simplest, simplest way) with the loop tilted to the right:
- insert the right loop at the front of the work into all three knit stitches on the left knitting needle from left to right and knit:
to photo hosting →
3.2. “Double broach” - knit three loops together with the central position of the middle (second) loop:
A) middle loop in the center and in front of the loops (under the middle loop the 1st and behind it the 3rd loop): slip 2 loops as knit stitches on the right knitting needle at the same time, thread behind the loops, knit 1 loop and put 2 slipped loops on it
to photo hosting →to photo hosting →to photo hosting →
An example in a pattern where when knitting three loops together it is important that the middle loop lies on top in the center::
to photo hosting → to photo hosting →
3.3. “double pull” - three loops together, tilting the knitted loop
left
When broaching, the loop previously removed on the right knitting needle is put on the one knitted from 2 together (and not vice versa)
A) in this case, the middle loop will be located in the center and behind the loops (the 3rd, then the 1st loop is “put on” the middle loop):
to photo hosting →
 to photo hosting →
- remove 1 p. as persons
- i.e. insert the right knitting needle into the first of three loops knitted together on the left knitting needle with a movement as when knitting a knitting loop, but we do not knit this loop, but re-slip it, the working thread behind the loop being removed;
- knit 2p. together persons
- i.e. we knit together the front 2nd and 3rd loops out of 3 knitted; on the right knitting needle - 2 loops: one removed, the second - from loops knitted together. With the left knitting needle, before work, pick up the removed loop and throw it to the left through the second loop and the end of the right knitting needle, one loop remains on the right knitting needle
 to photo hosting →
 to photo hosting →
Example in the pattern:
to photo hosting →
b) In openwork, there are variants of “double broaching”, when two loops are retaken on the right knitting needle as front ones, i.e. With a movement similar to when knitting knit stitches, the third loop is knitted. Using the end of the left knitting needle in front of the fabric, pry up both removed unknitted loops and move the left knitting needle from right to left to throw them through the knitted third loop.
Example in the pattern:
to photo hosting →
Note:
If a simple broach is performed precisely in order to turn the top loop to the left position, then a double broach is performed for the same purposes. Thank you for at least writing in the diagrams, using the expression “double broaching,” exactly what position and for which of the three loops should end up in the pattern, because the result will be different.
That is, after execution simple broach
out of 2 loops you will have one loop left on the knitting needle. After execution double broach
out of 3 loops, one will remain (two were reduced).
3.4. Knit three crossed knit stitches together, slanting left and right:
to photo hosting →
3.5. Knit three together, middle stitch on top, "GRANDMOTHER'S WAY":
There are three loops on the left needle. Swap the 1st and 2nd loops so that the 1st goes behind the second (take the 1st stitch back, the second one forward, put the 1st loop on the left needle first, then the second loop). Now on the left knitting needle the loops are arranged from right to left like this: 2nd, 1st, 3rd loops. Knit them together, with the 2nd loop in the center
Double broach also called "By knitting three loops together using the slip method" , she's the same "knitting three loops together with a tilt to the left", with a loop in the center, :
4. Purl 3 stitches together
4.1. 3 purl together, tilt the loop on the front side to the right:
to photo hosting →
4.2. Knit 3 ins. Purlwise, so that on the faces. side, the middle loop lay in the center:
to photo hosting →


