
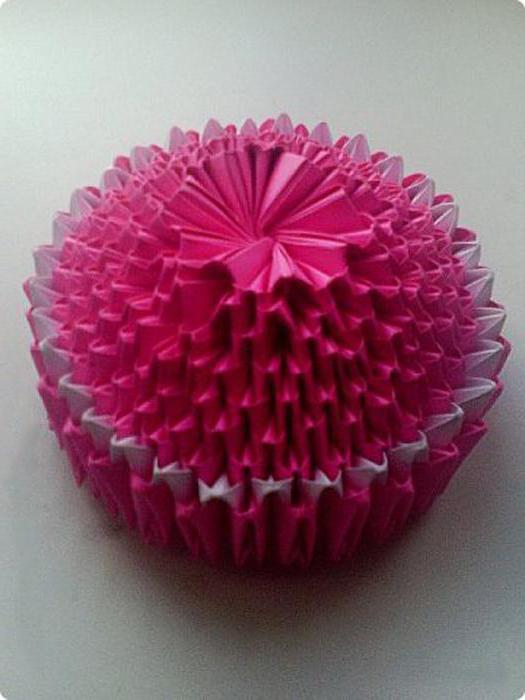
Every day something new and interesting appears in the world. And one of these innovations is modular origami flowers. This type of art became popular among young people and the older generation only a few years ago, but has already won one of the first places.
Flowers created using modules turn out to be very unusual and interesting. They can be made in natural sizes and colors using various papers or fabrics. But the best results are tulips, lilies in a basket and daisies.
There are many designs online for modular origami flowers, such as snowdrops, chrysanthemums and poppies. Let's look at step-by-step instructions for modular origami flowers, in particular lilies in a basket.
To make a paper basket with lilies you need to have:
- A4 sheets in pink, blue, green and yellow colors. 10 sheets of each color.
- You also need 30 white A4 sheets and scissors.
- To assemble the basket, you need to make pink and blue modules. Connect three pink modules together, forming sixteen such triplets.
- Then the workpiece is connected, and two solid rings are obtained. The first two rows are ready.
- Up to the eighth row, thirty-two modules are added in each row.
- The ninth row alternates two blue and two pink. The total is -32.
- The tenth row is one blue module on top of two of the same color. The same thing needs to be repeated with pink ones.
- Eleventh row - two pink modules on top of one. There is one in the twelfth row.
Next the arches are assembled. Each arch strip has thirteen pink modules: six on each side and one at the end. Only eight arches are made. Then on top of the pink modules there is a row of blue ones. The flower basket is almost complete.
When the row is completed, you should begin making the handle. To make a handle, there is a special diagram. There are forty-two rows of three modules in the handle. When the handle is completely assembled, you need to bend it a little and attach it. You can decorate paper crafts with leaves. A diagram for assembling a modular origami leaf can be found on the Internet.

Now let's move on to the step-by-step assembly of lilies. A description of the process will help with this. To make a lily, you need a square sheet of yellow or white paper.
The scheme for assembling colors of modular origami is simple:
- The sheet is bent diagonally with the corners up.
- The two side corners are connected.
- Next, one of the corners needs to be “opened” and aligned in the middle.
- The same thing is done with the second one.
The result was a figure with four triangular edges. All triangles are opened and leveled in turn.
- Next, the lower left corner, divided by a line, is bent towards the middle. You need to do the same with the right one. The resulting pockets open up.
- As a result, another triangle appeared in the middle; it needs to be bent upward, then flipped over like a page to make quadrilaterals without a triangle in the middle. The side corners are folded towards the middle on both sides.
- The petals open - the lily is ready. We fill the basket with lilies, and we get a flower still life.
A beautiful flower basket can be given to friends or placed in a prominent place so that the flowers of modular origami paper are pleasing to the eye.
This basket can be filled with calla lilies. Modular origami calla lily flowers, their assembly diagram or step-by-step instructions can also be found on the Internet. If the scheme doesn’t work, watch a master class from experienced origamists. Modular origami, flowers in particular, is a very beautiful and fascinating art that gives peace, joy and decorates the home with incredible paper crafts.

How to make daisies
Flowers from origami modules can be made of other types, for example, daisies.
- Cut a standard A1 sheet into sixteen equal parts. Take one sheet and fold it in half. Then cut it in half again and turn it with the fold towards you.
- Next, fold the edges towards the center, strictly along the resulting lines.
- Turn over and fold the flaps from bottom to top. The remaining ends are bent over the resulting triangle.
- Then straighten the structure, fold the figures in the form of triangles along the marked lines, and fold the cuffs up again. Fold the resulting format into a triangle. A pocket is formed on one side of the module, which will come in handy later.
- The design has two sides - short and long. When assembling, it is the daisy modules that are installed on the shortened side.
- The first twenty rows of the flower are assembled from modules of the same color.
- The next ten rows of modules of a different color are installed on the extended side. The connection should occur in a checkerboard pattern.
- Subsequent rows are installed on the shortened side. Turning the future flower over, attach the yellow modules. Each subsequent petal (module) is fitted with two elements.
For a medium-sized chamomile you will need about twenty white petals. On the final (sixth) row, not two, but three elements are put on. Essentially, the chamomile is ready. As a stem, you can use a plastic straw for drinks and cover it with green electrical tape or colored paper.

Tulips
Tulips that can be placed in a vase are beautiful. For a classic composition you will need more than 100 ready-made elements. The modules themselves are manufactured according to the above scheme.
- First, three elements are fastened together. The module on the left side will serve as the basis for the first row, and on the right - for the second. Next, four elements are installed in the second and third rows. Only after this does the assembly of the third row begin.
- The next stage is the formation of the height of the tulip bud. The ring will require about 15 elements. In this case, each circle closes into a ring, which is then carefully turned inside out.
Finally, it is necessary to attach the previously prepared petals evenly or in a chaotic manner. For convenience, the bud is designed to be attached to a drinking straw.

water flower lily
- It is necessary to fold the paper sheet so that it is visually divided into four parts.
- Then you should fold all the corners towards the center. This is an origami lotus pattern.
- Next, the corners are folded again, and you get something like an envelope.
- Then the model is turned over, and the resulting angles are again folded towards the center.
- Finally, fold all the corners of the square shape.
Even a novice master can master this flower.
Why is this necessary?
It has been proven that origami is an art therapy that is successfully implemented by doctors of various specializations. This activity develops technical design, architecture, and even mathematics.
Origami develops and strengthens the musculoskeletal system, vision and hearing, without taking into account the development of fine motor skills and imagination, especially in a child. This is a step-by-step process that requires perseverance and concentration. When practicing, it is necessary to take into account the age of the “master”.
Despite the fact that the modular origami technique is very special, even the most basic user can learn it. You just have to find the correct instructions on the World Wide Web.
Alexandra is a regular expert on the PupsFull portal. She writes articles about games, pregnancy, parenting and learning, child care and the health of mother and child.
This article will talk about how to make modular origami. A flower scheme is a whole culture of creating different bouquets. The basis of the crafts are small modules made of multi-colored paper. This technique is assembled like a construction set and allows you to obtain various voluminous flowers. There are a lot of variations of the creation: roses, lilies, cornflowers, daisies, water lilies and even flowers in the form of three-dimensional balls on a thin stem.
Amazing art
Modular origami is the amazing art of creating three-dimensional figures. This technique originated in China. Thanks to small folded triangles, you can make various variations of houses, animals, plants, cars. Adults and children create unusual souvenirs, garlands, and Christmas tree decorations with their own hands. It all covers The color scheme is very simple to create. Its peculiarity is that the crafts are made up of various small modules. Such flowers are almost impossible to distinguish from real ones. They are decorated with rhinestones, sparkles, foil, and varnish. Finished works are used to decorate the premises of houses, apartments and offices. Bouquets are hung in flowerpots, placed in vases, on bookshelves, and window sills.
Preparing for work
The workplace must have a flat surface. To make origami modules you will need:
- several sheets of A4;
- pencil;
- ruler;
- scissors;
- office glue.
Modular origami for beginners is just the first step in understanding this art. There are various more complex ways of making figures: development, quilling, kirigama, monegami, kusudama. For modular technology, paper or cardboard of different colors is used. A sheet of paper is drawn into several equal rectangles. To make the future craft larger, you can cut the sheet into 16 equal parts. If less - by 32.
- 53 x 74 mm;
- 37 x 53 mm.
Creating an origami module
1. The rectangle is folded in half horizontally.
2. Then fold it in half vertically. The workpiece must be returned to its original position. The result is two straight lines along which you can make a module.
3. One side of the workpiece is folded towards the middle.
4. The second mirror side folds towards the middle in the shape of an airplane.

5. The lower part of the workpiece is bent in an even line.
6. The protruding sections are folded.
7. The protruding workpiece is folded upward.
8. The structure is bent in half. Both sides of the module are firmly connected.
Modular origami for beginners covers various variations of creating crafts. Such schemes are very simple. If you follow the exact instructions, even a child will create an original craft on his own. Let's look at several ways to create flowers.
Modular origami: instructions for creating a lily
To create a lily you will need paper of two colors. You can combine shades to your liking. White and red, orange and gold, pink and yellow look great. You will need 85 modules of one color and 50 modules of another. To create the stem you need to use green paper. You will need 39 emerald modules. In total you will need 174 blanks. This is exactly the amount that modular origami covers. Assembling the lily starts from the center. The blanks are connected into an even ring. 2 rows are created. Each of them uses 5 modules. Thanks to these details, it will be possible to fasten future petals.

To create a flower petal, 1 module is used in 1 row. Then in each row their number increases by 1 piece. In row 2 - 2 modules, in row 3 - 3, in row 4 - 4 modules, in row 5 - 5 modules. Starting from the 6th row, their number decreases by 1 piece. 6th row - 4 modules, 7th row - 3 modules, 8th row - 2 modules, 9th row - 1 module. Since we used 5 modules to create the center, we will need 5 petals. To make the stem, you need to alternate 1 and 2 modules in each row. Odd row - 1 module, even row - 2 modules. The leaf of the stem is assembled according to the scheme: 1, 2, 3, 3, 3, 2, 1. The leaf is attached in the middle of the stem. Stamens are created from white cardboard. The material is rolled into a tube. Then it scrolls around its own axis. The flower is placed on the created stem. The stamens are inserted inside. The modular lily is ready! Another way to create a composition is presented above.
Queen of flowers - rose
A beautiful flower that will perfectly decorate a bouquet, this Modular art covers different creation techniques. The easiest way is shown in the photo. Let's consider the most difficult one in more detail. To create such a rose you will need 9 modules. Three of them have their valves cut off. Then they need to be rolled up. To do this, you can use a knitting needle, a tube, or a wooden stick. The long side of the module should be on the same level, that is, with a flat end. The corners of the remaining 6 modules are bent, creating the illusion of a petal bending. For the base, a small circle with a diameter of no more than 2.5-3.0 cm is cut out. The valves of the three modules are lubricated. Then they are attached to the base. Three more similar modules are glued inside. Modules with cut off valves are placed in the center.

The stem can be made from wire painted green. You can use a tube or stick, which must be covered with emerald-colored paper. The bud is carefully attached to the stem. To create a greater effect, you can cut out petals from green cardboard. You should get a beautiful rose (origami). Modular art recommends mixing these flowers with other types to create excellent bouquets. Usually, roses are placed in the center. Asparagus, bergrass, fern, gypsophila or ruscus are installed along the edges. Roses look great in combination with lilies, daisies, forget-me-nots, tulips and peonies.
Modular in the form of a ball
To create flowers, it is recommended to use double-sided cardboard or colored paper. It is desirable that the sides of the workpiece be of different shades. Modules of the same size are made of paper. Then they are given a three-dimensional shape. The corners are pinched and glued to each other. A three-dimensional ball is created from multi-colored modules. Rolled paper is used as stamens.

Tubes, sticks, laces and thin ropes are used to secure the workpiece. Professional modular origami covers various techniques for creating crafts. Kusudama color scheme is one of the rarest and easiest methods. If you strictly follow the instructions, you will get a bouquet of unprecedented beauty. Above is another way to create such flowers.
Origami is the Japanese art of creating objects, birds, animals, plants from a sheet of paper by bending it. Nowadays origami is available to everyone and it does not lose its popularity. We suggest you give in to the general trend and start creating flowers using modular origami for beginners.
Modular origami: flowers
In general, there are many types of origami. We suggest trying your hand at volumetric. To create such figures, a large number of identical elements are used - modules that are inserted into each other. The most commonly used is the triangular module. As a rule, it is folded from small pieces of paper, which are then inserted into each other. All module sheets must be the same size. 1/16 or 1/32 of the landscape sheet is most suitable. So, let's move on to creating modules:


As you can see, the module has two bottom corners and two pockets, so they can easily be inserted into each other. This is how origami flowers are created from triangular modules.

However, in addition to the triangular modules, you will need 1 kusudama module for the core of the module flowers.
- Fold a square piece of paper in half with the front side facing inward.
- Having unfolded it, fold it in half again, but in the other direction.
- Unfold the workpiece and fold it in half diagonally, inside out.
- We unfold the part again and fold it diagonally, but in the other direction.
- Having unfolded the workpiece, turn it inside out towards you.
- Using the lines created by folding diagonally, we fold the square.
- Bend the edge of the square and flatten it in the middle.
- Having turned the square over, we do the same with the 3rd edge, as well as 2 and 4.
- We bend 1 edge of the part 180 degrees. We see only its seamy side.
- We bend the edge so that the edge is along the fold line of the workpiece.
- We do the same with the 2nd rib.
- After this, the triangular edge between the bent ribs must be bent towards the top of the module.
- In the same way, in pairs, we add 5 and 6, 3 and 4, 7 and 8 ribs of the workpiece.
- We unfold the entire workpiece.
- We work with the wrong side. We begin to fold and assemble the part, as shown in the photo.
- Fold the remaining three corners of the workpiece in the same way.
- Our module is ready!


Modular origami flowers: master class
Now let’s proceed directly to assembling the cornflower flower. To do this, you will need to make 10 blue, 10 green and 70 blue triangular modules and 1 blue kusudama module. The assembly diagram for modular origami cornflower flowers is as follows:
1. 3 rows are assembled immediately:
- 1 row - 10 green modules;
- 2nd row – 10 blue modules, put on long side out;
- 3rd row – 10 blue modules, put on the short side outwards.

We get a small flower.

2. Turn the flower over to the other side and fold the 4th row of 10 blue modules.

3. In the 5th row you should put on 20 blue modules. This is done in such a way that there are 2 modules on each previous module. Free pockets should be inside.

4. Row 6 uses 30 blue modules. For every previous 2 modules, 3 modules are put on: 1 module is located in the center, and 2 side ones so that the free pockets are inside.
Covers a large number of different topics. Flowers, animals, cars, buildings can be made from paper. The choice is very large. Origami from Flower modules is a wonderful addition to any room interior. This craft will look great on a bookshelf, on a windowsill next to indoor flowers, or in a “living corner.”
The amazing art of origami
Origami is an ancient creative process. Initially, it was used in various rituals and ceremonies. But later art became popular not only in China, but also outside the country. The children liked it and are now widely used in extracurricular activities and art clubs. The most common type of creativity is modular origami. Three-dimensional figures are formed from small pieces of paper.
When a child is captivated by such a process, he figuratively brings to life the figures he has created. Such art not only develops children's thinking and imagination, but also helps the development of fine motor skills. After such additional master classes, children’s memory and thinking improve.
Creating Modules
To make flowers from origami modules, you need to prepare the modules themselves. For this you will need A4 sheets. They are cut into 16 equal pieces. Then the sheet is folded in half, then folded in half again. After this, the sheet should be turned over with the fold facing you. The edges fold towards the center. The lower lapels are bent upward, and the corners are bent into a triangle. The sheet unbends. The triangles are folded along the resulting outlined lines. Then the lapels are folded up again. The sheet is folded in half. The result should be a module of correct proportions.
The simplest preparation
You can quickly and efficiently complete origami “Flowers”. This scheme is very simple. It does not require much time and material. It eliminates the need to create a large number of modules, so it is perfect for beginners. To make this you will need green, white and yellow paper or cardboard. To create one voluminous flower you will need 1 sheet of yellow paper and 16 sheets of white. We add 17 special modules. It is important that such a module has two small pockets and two corners.
To form lines, you need to form a diamond. For this process, the prepared sheet is folded evenly diagonally. The remaining folds are turned inward. The side edges of the rhombus are carefully wrapped towards the main line formed vertically. The procedure is repeated 4 more times. When finished, the side line should appear in the middle of the figure. When making origami from paper (modules) “Flowers”, you need to make a blank with six smooth edges.
Bouquet of superb flowers
The lower corners of the diamond are carefully bent towards the center of the workpiece. Then the procedure is repeated with all angles. The sheet of paper smoothly straightens out. The end result should be a blank with bent lines for collecting the flower. The workpiece is bent along the intended lines from all angles. Then the sharp corners are wrapped in the middle. This should create the core of the flower. To make origami from Flower modules, the workpiece is laid out with the short side in the center.

In this case, 8x8 cm paper is used for the petals. After this, 8 modules are laid in 1 row in a circle. A yellow module is placed in the middle of the resulting ring. To decorate the stem, green colored paper rolled into a tube is used. You can glue petals to it or put a bow on it. To obtain flowers from origami modules as a bouquet, the creation scheme is repeated several times. For example, for a bouquet of 9 flowers you will need 153 modules. Of these, 9 are yellow and 144 are white.
Making the stem and leaves
You can use a tube, straw or small stick as a stem. The material is covered with thick green paper. The width of the sheet should not exceed 1 cm. The wrong side is smeared with office glue and pressed against the workpiece. Then it is wound in a zigzag onto a stick. To make leaves you will need a 15x15 sheet of paper or cardboard. It must be folded diagonally and then unfolded back. The edges of the workpiece must be folded towards the middle. Then fold it towards the center on the other side. For veins, all folds of the sheet are ironed. The sheet is turned over, and the edges are twisted onto a pencil or the edge of scissors. This process produces beautiful curls.
Simple colorful flower
To create origami from triangular Flowers modules, you will need 105 basic modules. To form the height of the flower, it is necessary to build the first three rows of 15 modules. Each row should close into an even ring. Then it turns out to the other side. Accuracy is very important in this process.

The end result should be one side of the modules turned outward. Then another 2-4 rows are made in an identical way. The height of the flower is at the discretion of the author. All rows can be done in one color or in different colors. If you use multi-colored sheets of paper, you should end up with a seven-colored flower.
Creating a three-dimensional flower
This scheme is based on modules that are inserted into each other, assembled into a constructor. Origami from Flower modules is made of 10 modules on each row. When assembling the first row, 10 modules are placed on the short side. They bend in the form of a circle. Then 10 more modules of the second row are attached to them. When creating row 3, the modules are installed on the long side. Then the tails of adjacent modules are connected.

The result should be a diagram of connecting the modules in a checkerboard pattern. After this, the flower turns over. The remaining rows will be made up in modules on the short side. Row 4 is identical to the previous ones. On the 5th row, two modules must be put on for each module. That is, for the 5th row you will need not 10, but 20. The free pocket should be inside. Row 6 is the last. It will consist of 30 modules. 3 modules are put on 2 elements. When creating a figure, free pockets should be inside the workpiece. The result should be origami from the Flower modules.
Some craftsmen make real masterpiece flowers from paper. Looking at them, it seems that we are unlikely to be able to do something similar. But in fact, there are options for making paper flowers that even children can master. And the option presented below is just that - simple, not requiring much effort, time and patience.
What you need to make a paper flower:
Colored paper (in this case, very convenient colored pieces of paper for notes);
glue stick.
Step 1. Making a petal
We will form a flower petal from a 9x9 square. In this case, blocks with sticky notes are indispensable!

Fold the square in half diagonally.

The corners of the resulting triangle are aligned with its vertex.

We get a rhombus.

We wrap the edges of the rhombus towards the central axis.


We straighten the resulting workpiece.

We turn out the “tails” on both sides as shown in the photo.


We get this design.

We bend the “ears” extending beyond the edge of the diamond inward.


We wrap the edges inward along the existing line.


We wrap the petal, connecting the folded edges.


Apply glue to one of the sides to be glued.

Glue it together and get a petal.

Petals can be from 5 to 10-15.

Step 2. Glue the petals together.
Coat the end side of the petal with glue.

Glue the two petals together.

We glue all the petals one by one and get this paper flower.

The final look of the craft. Photo 1.

The final look of the craft. Photo 2.
This flower using the modular origami technique is very easy to make with your own hands. In this case, you can vary the number of petals, glue the “stamens” inside the flower together, and paint them in a contrasting color. If desired, you can add a bead to the center. Such a paper flower can become the basis for making topiary or an original element of gift wrapping. And if you like other flowers, then do not rush to leave our site, because we will show you how to make tulips from paper. In our opinion, the craft turns out very beautiful!


