Knitting a product begins with a set of loops and ends with knitting the neck. This is a very important stage. After all, the appearance of the product will depend on how neat the neck looks. So be patient and get started.
The principle of knitting a neckline is the same for both hand knitting (crochet, knitting) and machine knitting.
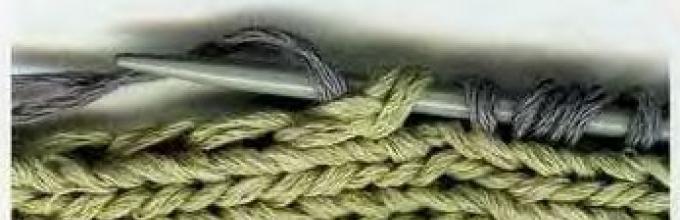
To knit the neckline, it is better to use circular knitting needles or sock knitting needles (5 pieces). It is easier to knit on them in the round and the neckline will be inseparable from the product.
In order to knit, for example, a round neck, it is necessary, where the collar begins, to divide the product into two parts and each part is already knitted separately from each other; for symmetry, you can knit from two balls at the same time.
So, the middle 6 loops are closed, and then knitted like this: we decrease three loops at the end of the row per row - twice, then decrease two loops per row - three times, then 1 loop per row twice. Then decrease one stitch in each row until all stitches are closed. Knit your product on the basis that the neckline depth is 32 loops, and the half neckline is 24 loops. In general, this calculation of decreases depends on the desired depth of the neckline.
Now for the edging, use one knitting needle to cast on loops along the edge of the neckline. To do this, we fasten the thread on one side, and entering the loop of the previous row with a knitting needle, we pull out the working thread. On the straight sections of the neckline, insert the knitting needle into the edge loop of the previous row, and pull out the working thread and leave it on the knitting needle. On the rounded sections of the neckline, you need to join the knitting needle one row lower - this will give the neckline a neat edge.
Articles that will be useful:
A set of loops along the side edge of the canvas
 ,
,
Methods for attaching processing parts
 .
.
 In order for the neckline to be elastic, it is better to knit it with a “1x1 rib”, that is, knitting the following rows - 1 knit, 1 purl. Then finish knitting and bind off the loops.
In order to make a neckline edging, to even it out, you can knit the first row of the neckline purlwise and then knit with an elastic band.
The neckline can be tiedwith lapel
 , that is, double - for this you need to knit with an elastic band of 15-20 cm, or without a lapel - finish knitting at a distance of 5-6 cm from the beginning of the neckline.
These types of necklines are suitable for sweaters, jackets, and jackets.

 When knitting a V-shaped collar, you need to tie the product to the toe and divide the knitting into two parts. If the neckline is 96 rows and the width of the half neck = 24 loops, then you need to knit 2 loops at the same time from the side of the neckline, and decrease one loop 24 times in every fourth row.
In order to knit a V-shaped neck, you need to start casting on with circular knitting needles from the first loop of the cape and cast on loops around the neck. Then knit the length of the binding you have in mind. You can also choose the drawing yourself. Then, having knitted 6-8 cm of binding, the knitting is completed. The incision that remains on the toe is stitched with thread.
If you knit without a seam, then decreases are made in the middle; you can knit like this: 2 inm, 1 middle loop (better if it is a knit stitch), again 2 inm. When decreasing the stitches, make sure that the 1x1 elastic band does not get lost. Or, as an option, knit three loops together in the middle.
Important:
Knitting three stitches together  ,
,
Knitting two stitches together
 .
.
 You can knit the neckline with a roller. To do this, you need to cast on loops along the length of the neckline and knit with 5-6 cm facial loops. Finish knitting. Carefully roll the neck into a roller.
This neck design is suitable for light summer sweaters, sundresses, and dresses.
Surely every craftswoman will agree with the statement that processing the neckline with knitting needles occupies a rather important place in creating a knitted product of any complexity. The type of neck is one of the important aspects by which we can determine the fate of any thing: we either save it or throw it in a landfill due to its unsuitability. Thanks to the knitting of the neckline, you can not only preserve your favorite item, but also give it zest and elegance.
So that you can personally verify this, we provide photos of knitted items for beginners, the neck of which was processed with knitting needles.


So, if for some reason you have a desire to work the neckline with knitting needles, then we suggest you pay attention to the master class located a little lower, which contains instructions for processing the neckline with knitting needles.
Step-by-step algorithm
First, let's prepare all the necessary tools.
We will need: circular knitting needles and thread. Let's take circular knitting needles, since they are longer. With the help of such knitting needles, we can cast on the required number of loops, which are located along the entire edge of the product. Thanks to this type of knitting needles, we will not have to sew the neckline, as it will have a solid look.

We begin knitting our neckline, cast on loops along the edge of the fabric with one knitting needle. We use edge loops. This method will conditionally divide the neckline into several equal parts. On the vertical section of our neckline we will cast on loops that are located below the chrome ones, this will give the finished product elegance.

Now you need to level the edge of the beveled sections of the neck. To do this, you need to insert the knitting needle into the corresponding loop but one row lower and pull the thread. You can see how it should look in the image below:

In areas that remain flat, the knitting needle must be inserted under the edge loop and the main thread pulled out. In order to prevent the loop from stretching, it is necessary to adhere to a clear sequence when casting on: skip every fifth loop in the next row.

When the work of casting on loops comes to its completion, you can begin knitting the neck itself. In performing this stage of processing the neckline with knitting needles, an elastic band will be useful to us, which will be equal to the following dimensions - 1 * 1 or 2 * 2. Now let's look at these options step by step.

On the knitting needles you need to cast on the required number of loops and knit 1*1 7 rows with an elastic band.

In the next stage, we will lay out part of the product on a flat surface and begin sewing on the neck. We do this with a kettel stitch. To form this type of seam, you need to remove the needle from the front side and insert it into the second loop, after the top into the first. After this, the thread with the needle must be brought up from under the bottom, making its way through the third loop, now from top to bottom, entering the second loop and exiting through the fourth from the bottom to the top. You need to sew the neckline on both back and front sides at the same time.
If you did everything correctly, then the neck processed in this way should look like this:

Second option
The second option for processing the neckline with knitting needles is similar to the first in that the neckline in it is also knitted separately and fixed using a knit stitch.

Let's start by calculating the required number of loops, this is necessary so that our binding is of the correct shape. After casting on the loops, you need to knit a 2*2 elastic band.

Now let's start double knitting. We remove the edge loop, yarn over, knit a new loop from the left knitting needle with the front side, using this principle we continue knitting throughout the entire row.

Now we remove all the loops on the wrong side onto the right knitting needle without knitting.

We knit all available yarn overs with knit stitches. It should look like this:

Now we need to turn the work around. All the loops you just removed need to be knitted, and the rest should be removed. We repeat this sequence, making three more rows, after which we divide the panel into two parts and transfer it to different knitting needles. Now you need to close the loops on one of the knitting needles using one of the methods we discussed above.

After finishing knitting the binding, you must first iron the part processed with closed loops, then do the same operation with the part that was formed with open loops. Now we will lay out the parts on a flat surface and sew them with a quilt stitch, starting from the left shoulder seam. Here's an example of this:

The part of the neck tape with open loops must be sewn to the product on the wrong side using an overcast stitch, carefully monitoring the thread tension.
The neck trim processed in this way always looks very neat and harmonious, you can verify this by looking at the image below.

With this step-by-step instructions for knitting a neckline, you can resurrect your favorite piece, add color and uniqueness to it.
Video on the topic of the article
We have discussed the simplest method of knitting and knitting a neckline, but there are a great many of them. You can learn about some of them by watching the videos below.
In order for a hand-knitted product to have a finished look, it is necessary to tie the neck beautifully, and knitting needles are perfect for such work. This applies to the neckline of any jacket, cardigan, vest or sweater. There are several classic gate shapes. In addition, various methods are used to tie it. Step-by-step master classes allow even novice needlewomen to successfully cope with this task.
Tying the neckline is the final stage of the manufacturing process of any knitted item, and the appearance of the new wardrobe item largely depends on it. Due to this, it is very important to do the perfect processing.
First of all it is necessary determine what shape the cutout will be finished product. This problem should be solved before starting work, that is, at the stage of creating a sketch. Keep in mind that necks come in different shapes. In addition, they depend on the purpose of the thing.
For example, products for cold time year, a round and closed neckline, which is finished with a high stand-up collar or trim reaching to the neck, is suitable. And the neck summer top or openwork sweater Usually performed in the form of an open or semi-open neckline, therefore the processing should be thin and light.
The type of cutout also depends on the style of the item being made.
Experienced needlewomen usually adhere to several basic rules in this matter:

It should be noted that each craftswoman, when creating a new designer item, can choose the cutout option that, in her opinion, is most suitable. Thus, some knitted dresses and sweaters have a boat-shaped neckline. This neckline leaves not only the neck but also the shoulders exposed.
Loop calculation
In order for the collar to have the desired size, correct appearance and be symmetrical, before you start tying the neckline with knitting needles, you should calculate the number of loops. To do this, you need to take the knitting needles and threads that were used to knit the product, and use them to make a pattern that repeats the pattern on the item.
Before choosing a method, you need to learn how to form it.
Detailed instructions will help with this:

This work will take some time, but it will allow you to choose the best knitting neckline. But there are quite a lot of options for such finishing, and therefore it is better to consider several models.
Gate design options
There are many simple and complex options for tying a collar with knitting needles. So, for the neck of a sweater, knitting a simple binding will not be difficult, but decorating with a quilt stitch will require certain skills from the craftswoman.
Simple binding
This design method is considered the most popular. To work, you need to prepare threads of the appropriate color and circular knitting needles, which make it easy to string loops along the edge of the collar, which makes the binding seamless and uniform.
The operating procedure is as follows:

Even a novice needlewoman can do this kind of work. In addition, carefully executed trim is no less beautiful than complex models.
Separate harness
Separate binding is somewhat more difficult to perform, but the result is more impressive.
The knitting process consists of the following stages:
- Calculate the links and knit three centimeters with an elastic band, one knit stitch alternating with one purl loop.
- Start double knitting.
- Remove the first edge stitch and yarn over, knit the next stitch. As a result, the number of loops should almost double.
- They continue to work.
- The yarn overs made are knitted with knit stitches, and the new ones are transferred to the second knitting needle. The working thread should be in front of the product.
- The knitting is turned over and the loops that were removed are knitted. The remaining ones are removed so that the thread remains before work.
- Repeat three rows of circular knitting.
- The loops are divided into two parts, transferring them through one to different knitting needles.
- Closing begins with the first needle.
- Then the loops from the second are moved onto the thread and sewn to the front side of the item using a ketchy stitch. Sewing begins on the left side of the shoulder.
- The loops that were closed are sewn to the wrong side of the product using the usual method.
This type of processing produces an elegant collar, but requires some skill to complete.
Double roll processing
The double ruff design gives the neckline an unusual look.
The instructions, which describe the finishing step by step, look like this:

This finish is suitable for decorating the collar of sweaters made of thin threads. It does not weigh down the product and looks stylish and impressive.
Double sided stand
The undoubted advantage of such a collar is that it looks equally good on both sides. In addition, this design holds its shape both buttoned and unbuttoned. To knit it correctly, you need to follow a certain procedure:

This way you can design the neck of the sweater. It should be noted that this harness looks great on things whose collar is fastened with a zipper or buttons.
V-neck tying
Experienced craftswomen have noticed that when calculating the loops to design a V-shaped neck, a certain pattern is observed. They began to actively use it when knitting necklines.
 It consists of the following:
- The lower point of the neckline is 4-5 cm below the chest line - loops should be decreased every fourth row.
- The neckline begins 6-10 cm below the chest line - decreases are made 1-2 times in every sixth row and 1 time in the fourth row.
- The neckline reaches the waist or starts just above it - the loops should be decreased every sixth or eighth row.
The V-shaped neck is decorated with different types of trim. The needlewoman decides what type of finishing to choose based on the model of the wardrobe item and her own taste. But the most common option is tying with tape with a middle loop.
There are two ways to do it.
In the first method, the sequence of actions is as follows:
- The needle is inserted into the first loop from the left shoulder seam.
- Loops are cast on this needle along the perimeter of the neckline; the cast-on should be uniform.
- The closed loop at the cape of the front part of the product is knitted with the front one. Then knitting continues in the round according to the elastic pattern.
- When the work reaches the middle of the cape, the loop located in the center is removed like a front one.
- The next one is knitted according to the pattern.
- It is pulled through the two removed ones, resulting in one loop out of three.
- This reduction at the cape of the front of the product is carried out until the binding is wide enough.
- At the final stage, all loops are closed with a needle, which makes the edge elastic.
In the second method, the number of stitches cast on at the front of the neck should be odd.
The work consists of the following stages:
- Form a V-shaped neckline.
- The middle loop is transferred to a pin, and then the left side of the work is completed.
- When making a bevel, the sixth and fifth loops in front of the middle one are knitted together, purl one, and then three before the middle one are knitted.
- On the wrong side the work is done in purl stitch.
- Decrease continues to be repeated every 4th row.
- On the front side, in rows where there is no need to decrease, 2 purl loops are knitted purlwise.
- The right side of the product is made symmetrically to the left.
- All parts are sewn together.
- Loops are cast on circular knitting needles to form the binding. They begin to do this at the shoulder seam, adding a loop left on the pin. Their number must be a multiple of two.
- The row is performed in knit stitch.
- Knit an elastic band in which one front loop alternates with one back loop.
- The middle loop is attached with one front loop.
- The middle and previous links are removed.
- The following is performed with facial knitting.
- The previously removed links are pulled through it.
- Decrease is carried out in each row until the end of the work.
Making a V-shaped neck requires the craftswoman to be careful and strictly follow the instructions. But the difficulty of the task is compensated by the beauty of this gate shape.
This type of neck tying will make the item truly remarkable, but it is difficult to perform.
 Instructions for making a cutout with a kettel stitch:
- Calculate the length of a simple elastic band and cast on the required number of loops.
- Knit a 3 cm pattern.
- Both sides of the trim are sewn to the collar with a needle using a kettel stitch.
Due to the neatness of the seam, this type of neckline design turns out to be very original and interesting, and the collar looks like an additional decoration.
There are many options for tying the neck with knitting needles, so you can choose the perfect design for each collar shape. In addition, this allows craftswomen to fully express their taste and skills, as well as create unique things that surprise with their effectiveness and beauty.
Learning to knit a V-shaped neckline
This type of neckline for knitwear is unlikely to go out of style. It is used in knitting sports and sophisticated patterns for men, women and children. You can wear a model with such a neckline over a blouse or simply on the body, and beautifully tie a scarf well matched to the model.
For a V-neck, the loops are divided in the middle and bevels are formed on both sides of the middle using decreases. If there is an odd number of loops, the middle loop should be closed or left temporarily (see the red ring in photo 3).
Simple decreases are made directly at the edge; for this, one loop is pulled through another (1 of them is edge). For the right half of the work in every 4th r. knit a row, except for the last 2 stitches, then knit these 2 stitches together (photo 1). For the left half of the work, knit the first 2 stitches together with a tilt to the left, i.e., remove the 1st stitch as a knit stitch, knit the 2nd stitch and pull it through the removed loop, then continue knitting with the main pattern (photo 1 ).
Casting on loops for binding along such edges is not so easy. Therefore, the 2nd method is recommended, in which the decreases are noticeable, since they are performed at a distance of one or several loops from the edge. For the right half of the work in every 4th r. knit a row, except for the last 4 stitches, then knit 2 stitches together, finish with 1 knit stitch and an edge loop (photo 2).
For the left half of the work, start with an edge and 1 knit stitch, then knit 2 stitches together with a tilt to the left, as described above, then continue knitting with the main pattern (photo 2). An inclined path is formed between the main pattern and the edge. Decrements made at a certain interval from the edge may have the loops tilted towards the bevel, in which case they are a decorative design for the cutout. In this case, knit as in the previous version, but 2 stitches knitted together with the knit stitch and 2 stitches knitted with a slant to the left are swapped (photo 3). When knitting with some patterns, such as semi-patent or patent elastic bands, the neckline is not formed with simple decreases, because they fall alternately on the front or back loop.
Reductions for V-neck
In this case, it is recommended to perform double decreases, which are done not every 4th, but every 8th r. In photo 4, the detail is made with semi-patent elastic. For the right half of the work, knit all the loops of the row except the last 6 stitches, then knit 3 stitches together (= 1 double decrease), finish the row with 2 stitches of semi-patent elastic and hem. For the left half, start with an edge and 2 stitches of semi-patent elastic, then perform a double decrease, i.e., remove 1 stitch as a knit stitch, knit 2 stitches together and pull the removed loop through the knitted one (photo 4). If a pattern motif is made in the middle of the knitted part, it is recommended to use it to design a V-neck.
For example, the two slanted face loops of a diamond serve as the edge of a V-neck (photo 5). The middle “braid” continues on both sides along the bevels of the neckline (photo 6). The symmetrical middle motif of the white pullover from page 23 at the beginning of the V-neck is divided into 2 parts that continue on both sides of the neckline. Decrements in this model are made at a distance of 27 sts from the edge.
V-neck trims
When knitting the binding, an angle should be formed in the middle of the front. There is a very simple way to knit tape. Using circular or flexible knitting needles, cast on loops along the edge of the neckline (start and end in the middle of the front) and knit the binding with an elastic band (alternately 1 knit, 1 purl) in rows in forward and reverse directions to the desired width.
In every 2nd r. at the beginning and at the end of the binding, add 1 stitch.
Place the ends of the trim on top of each other and sew along the edge of the neckline (photo 7). If the V-neck is deeper and the trim is wider than in the photo, then decorating the neckline with such an asymmetrical trim is very impressive.
For a symmetrical binding, the stitches decrease in the middle of the front. Cast on an even number of stitches on short circular needles along the edge of the neckline and knit in the round with an elastic band (alternately 1 knit, 1 purl).
In every 2nd r. knit the last 2 stitches before the middle of the front together with a tilt to the left, knit the next 2 stitches together with the front one (photo 8). If the middle loop of the main pattern was closed or temporarily left, then it is included in the binding. For the binding shown in photo 9, in every 2nd r. knit the loops of the row with an elastic band, except for 1 st in front of the middle loop, remove the next 2 sts together, like knits. (i.e. insert the knitting needle from left to right, first into the middle one, then into the previous loop), knit the next loop in accordance with the pattern and pull the removed loops through it. If the neckline is decorated with double trim, then first on the faces. On the side of the binding, decreases are made on the middle loops, then on the wrong side. on the side of the binding there are also increases on the middle loops. Knit the binding with decreases, as described above, to the desired width and mark the fold line = row with purl loops. Then, on both sides of the middle loop, increases are made (knit 1 crossed loop from the broach) in the same rhythm as decreases, until there is an initial number of loops on the knitting needles, respectively. double-width binding is knitted (photo 10).
If the binding is made with a 2x2 elastic band (alternately 2 knits and 2 purls), then there should be 2 knit stitches in the middle of the front. In every 2nd r. knit loops, except for 1 st in front of the middle 2 sts, then knit 2 sts together, knit the next 2 sts together with a tilt to the left (photo 11).
If the main pattern is raised, especially along the edge of the cutout, then the finishing of the edges should be simple and unnoticeable. Cast on loops along the edge of the neckline, knit 1 p. with an elastic band (alternately knit 1 and purl 1) and close the loops (photo 12). The pullover from page 23 has an edge tied with st. b/n and picot, emphasizes the romantic openwork pattern.
How to quickly and step-by-step knit a neckline with knitting needles, and do it neatly and beautifully? It seems like it would take a lot of effort and time to complete such a task. Of course, there are a lot of options for finishing the neck of a product, but among them there are also those that beginner needlewomen can do, and the video at the end of the article will answer the remaining questions.
How to knit a neckline: V-neck and binding in MK
The processing of the neck directly depends on the type of cutout on the product. The most popular options are square, round or oval, and V-shaped. The latter is often found not only in adult, but also in children's clothing, which is explained by its convenience. To correctly knit and tie such a neckline, you need to follow some rules - determine the depth of the neckline itself, the number of closed loops, as well as the frequency of future decreases. It’s easier to navigate using a specific example, where the stages of work are described step by step.
If the depth of the cutout is 36 rows and the width of the cutout is 36 loops, then the steps will be as follows:
- Knitting will go on separately, on both sides from the beginning of the neck, respectively, and the decrease will go on separately on both sides, 18 loops each.
- In order to calculate how many rows you need to decrease the loops, you need to divide the number of rows by the number of loops in half the cutout. In this particular example, 36 divided by 18 is equal to 2. That is, in every second row two loops are knitted together.
- Repeat this action 18 times on each side - the result will be the front of the item.
After the product is ready and the shoulder sections are sewn, it’s time to directly tie the neckline.

The best option for this treatment is binding, which can be knitted separately or directly on the neckline. It is knitted with circular needles in the following order:
- On the front side of the neckline, from the edge, starting from the shoulder seam, cast on loops, inserting a knitting needle under the edge loops, their number should be odd.
- One row of binding is knitted with knit stitches, and the next rows are knitted with a 1x1 elastic band.
- The bottom loop of the corner should be the front loop, and in order for the binding to look harmonious, you need to shorten the loops in each row. This is done in the lower front loop, it is swapped with the previous one, and three loops are knitted together behind the back wall. Thus, a pigtail is knitted in the middle of the trim.
- In this way, knitting continues until the binding reaches the desired width. After this, the loops are closed, and the thread is cut and put away on the wrong side.
As mentioned above, this popular type of binding can be made separately from the item, but it requires a little more effort than a simple binding. The most important point in this work is the correct calculation of the loops. If the quantity differs more, the neck will puff up, if it differs less, the collar will tighten.
The binding itself is knitted with an elastic band of the selected size - 2x2, 1x1, less often one and a half. When the desired height of the binding is reached, it is time to double the loops. This is done as follows - two loops are knitted from one - behind the front and back walls, respectively. Next, a hollow elastic band is knitted. Its height can vary from 4 to 6 rows, depending on the thickness of the threads. After this, place the loops on different knitting needles. The loops on the wrong side can be closed in any way and sewn from the wrong side of the item using an overlock stitch. The loops that will be on the front side need to be ironed and stitched to the neck.

This binding is carried out on circular knitting needles, and the work can be divided into the following stages:
First stage. Cast on stitches along the edge of the neckline and knit the binding using stockinette knitting. The height of such binding should be about 6 cm, and the loops close freely.
Second phase. The resulting binding must be twisted onto the front side so that the wrong side is on the outside.
Third tap. Raise the loops along the first row of knitted binding and knit the second binding. It should be slightly narrower than the first one, so for every 10 cm you need to cast on three fewer loops. Knitted tightly in stocking stitch, about 7 cm, the loops close freely.
Fourth stage. The second binding is twisted in the same way. Ready.

A simple and at the same time effective option for tying the neckline is done with a one-and-a-half elastic band. It is similar to a 1x1 elastic band, but in the front row, and if we knit in a circle, then in every second, the front loop is removed on the right knitting needle without being knitted, the purl one is knitted purlwise. Purl row – 1 knit, 1 purl.
To make such a binding, you will need not only knitting needles, but also a hook. They need to knit a chain along the edge of the neckline, preferably with threads of a contrasting color. This way the binding will be more neat. From under this chain, on the wrong side, loops are cast on the knitting needles, and then the binding is knitted to half the height you need. The edge of the section can be emphasized by swapping the knit and purl stitches on the middle row. Having knitted the second half of the binding, close the loops with additional thread and bend them to the front side.
Crochet a chain from the wrong side, grabbing the loops of the binding and thereby attaching them to the product. The result is a seam that resembles a ketel stitch, but is easier to perform. Having passed the row to the end, fasten the threads. Ready.

Video materials for clarity


