Recently, people increasingly prefer homemade decorations to store-bought decorations for the New Year holidays. DIY New Year's toys made from paper will be a wonderful decoration for both the Christmas tree and the entire room. And the process of making jewelry itself will help you feel the approaching holiday and magic. Dekorin advises doing such creativity with children, because it will be an invaluable experience for them. Today we have prepared for you some interesting ideas on how to make New Year's toys from paper with your own hands.
Beautiful DIY New Year's toys made from paper
The New 2018 Year of the Yellow Dog is coming very soon and, of course, we all want to decorate our apartment in a special way. There are quite a lot of options on how you can make a New Year's toy with your own hands, but we will focus on the easiest and most affordable - holiday decorations made of paper. All you need is boundless imagination, a desire to create and a little free time.


Paper balls
Balls can be classified as voluminous New Year's toys made with your own hands from paper. So, they will serve as a wonderful decoration for the Christmas tree and the whole house. You need to prepare:
- paper that you like;
- regular glue;
- scissors;
- compass.
The process is:
Similar circles should be cut out of paper (21 pieces). Fold each circle in half twice, and then fold both sides of the circle again to form an equilateral triangle. We will use it to make the next triangles.
Now glue this strip into a kind of circle. Divide the remaining ten parts into five pieces, and in turn glue them into a circle (as in the photo). It turned out to be two unique lids. Now they need to be glued one by one to the base so that you get a ball.
The finished decoration must be pierced with a needle and any thread (or string/braid) so that there is something to attach it to. Ready! It turns out that making a New Year's toy out of paper with your own hands is elementary.


Paper snowflakes: DIY New Year's toys
Not a single winter holiday would be complete without snowflakes. They are traditionally used to decorate windows, walls and Christmas trees. There are ordinary snowflakes, cut out of paper, and there are more complex ones, but even more beautiful (using the origami technique). Today we will figure out how to do the latter. The manufacturing process is as follows:
- cut out 6 identical squares from paper. Next, fold them first diagonally, and then in half;
- make several cuts along the fold;
- unfold the square, inner tabs and connect them together;
- Connect the outer petals to the other petals on the remaining squares (using regular glue or a stapler).
- An unusual and beautiful snowflake is ready! Now, if you wish, you can decorate it with a variety of stars, sparkles, etc. This DIY paper New Year’s toy will fit perfectly into any corner of the room, and its manufacture will give you anticipation for the coming holidays.


DIY Christmas toys made of corrugated paper
It turns out that there are a lot of materials from which you can make toys, and corrugated paper is no exception.
So let's make a cute green Christmas tree. You need to prepare the following items:
- green corrugated paper;
- cardboard in standard A4 format;
- regular glue and scissors;
- pencil;
- decorations for the Christmas tree (to your taste: beads, balls or something similar).
How to make a craft:
- We make a cone from a sheet of cardboard.
- We wrap corrugated paper around it.
- Now you need to make needles for the Christmas tree. So, the paper should be cut into long strips and made into a kind of fringe.
- Wind the resulting fringed strips around a pencil. The result was nice rolls that will later decorate the Christmas tree.
- Lubricate the base of these rolls with PVA glue and glue them to the Christmas tree cone.
- Using this method, you need to cover the entire tree and decorate it with prepared decorations.
The Christmas tree is ready!


It's time to think about how to decorate your door before the holidays. And corrugated paper will help us with this again. Everything is easy here. First you need to cut out a circle from thick cardboard and stick on it the same circle of green corrugated paper. Now you should make rolls of red and green paper and attach them to the wreath with glue (as in the photo). Cut out a large bow from red corrugated paper and decorate the wreath with it. That's all! Simple and beautiful!
DIY Christmas toys made from colored paper
New Year 2018 is coming, which means it’s time to make New Year’s toys with your own hands. The Christmas tree must have the symbol of the New Year - the Yellow Dog. And it will be doubly pleasant if we do it ourselves. By the way, paper crafts in the form of DIY New Year's toys are an excellent option for parents and their children. In schools and kindergartens, the child will need to bring a craft for the New Year, and such a dog will definitely not go unnoticed. So, call the kids and make this wonderful craft together. You will need the following materials:
- colored paper (a couple of sheets of yellow or beige);
- colour pencils;
- pencil and ruler.
Such a simple craft is guaranteed to interest your child, because ordinary paper will make a kind and cute dog.

The manufacturing process is as follows:
- Bend the square sheet diagonally to form a triangle.
- On the right and left sides of the triangle, bend the edges down (these are the ears of the future puppy).
- Now step back a little from above and, grabbing the ears, bend the paper down.
- Next, bend the lower triangle according to the example in the diagram. We have prepared the dog's face.
- Using colored pencils, draw the animal's nose, tongue and eyes. Also, if you want, draw random spots.
- To make the body, take a second square piece of paper and fold it diagonally. Again it turned out to be a triangle.
- Turn this triangle so that its fold is located at the bottom. Now bend the sharp edge at the bottom (as shown in the diagram). Next, bend one side of the triangle forward and the other back, so that the edges protrude. Here come the paws and tail.
- Draw spots on the dog’s body. Now connect the puppy's head together with the body.
By the way, you can use the same principle to assemble other puppies, the diagram for which can be seen below.


DIY New Year's toys made from napkins
It turns out that you can even make unusual Christmas tree decorations from napkins. What is needed for this:
- multi-colored napkins;
- PVA glue;
- paper;
- threads;
- multi-colored markers.
Let's get started:
- We prepare a cardboard stencil of the toy you need. Ours is a frog.
- Take one napkin and fold it three times horizontally.
- Fold three more times (as in the photo). The result is a square that needs to be secured with a stapler.
- Now cut out a circle from the square and straighten each layer towards the middle so that you get a fluffy ball.
- All that remains is to attach these balls to the stencil on both sides, as well as finish drawing and gluing the necessary details.
Voila! The frog is ready! In a similar way, you can make any other New Year's toy from napkins with your own hands. There would be a desire!


DIY paper garland
In this master class we make our own New Year's toy out of paper. Namely, a beautiful garland.
Paper garlands will definitely bring a cozy festive atmosphere to your home, especially if they are made by yourself.
This option is ideal for owners of a sewing machine. You need to cut out the required number of circles (or stars, Christmas trees, snowflakes, and anything else that comes to mind) from the paper or felt you like. Then simply stitch all the pieces in one row. Ready! Perhaps this is the fastest option for making a New Year's garland from paper with your own hands.
There is another original version of the holiday garland. So, cut out future tags from cardboard. It's good if there are a lot of them. Now each of them needs to be decorated: write wishes, draw pictures, paste photographs, stickers, pictures, etc. After registration, all that remains is to string the tags on a string. Ready!


Believe me, such a garland will definitely be original and unique.
Dekorin hopes that by looking at the photos of New Year's paper toys with your own hands, you will gain inspiration and feel the New Year is approaching.
All children love to decorate a Christmas tree, but they will also definitely enjoy making voluminous Christmas tree decorations from paper with their own hands. After all, how interesting it is to decorate a Christmas tree with your creation, admire it every day, and show it to everyone around you.
For crafts you will need:
- Colored cardboard of various colors (not very thick);
- Threads, braid, twine (optional);
- Double-sided or regular tape;
- Glue stick, scissors, simple pencil.

Volumetric Christmas tree decorations made of paper step by step
1. Bell

Using this template or any other from the Internet, trace and cut out 6 bells in a flat version.


Fold each one in half, being careful to fit the edges together.

Glue together one half side of one piece to the half side of the second.

Glue all 6 parts together, then place a thread in the center and secure it with tape. In principle, glue will also cope with this task, but with tape it is faster and more reliable.

Glue the last two sides together to create a complete three-dimensional bell for the Christmas tree.

2. Complex DIY Christmas tree toy

Redraw or print the template.

Cut out 6 shapes.

Fold them in half.

Take one part and apply glue to its half, also glue the second part to it with one side, adjusting the ornament.

Repeat until you have glued all 6 pieces together.

Before gluing the remaining edges, do not forget to place a rope or thread in the middle of the toy, making a loop out of it.
3. Christmas tree toy in the form of a multi-colored top

Now we complicate the work a little, although it still remains as easy as the previous ones.
Using the template, cut out 6 parts, but in different colors. Alternatively, some may be repeated in color.


Glue the sides together after placing a loop of thread inside.

4. Paper bear

Children will especially enjoy making this Christmas tree decoration and then viewing it on the tree. Using the template, cut out 6 bears.


Fold them in half.

Glue one side of the bear-shaped blank to the other side of the second blank.

Before gluing the last sides, tape a thread in the middle, making a loop out of it.

Finally, on all parts you can draw the bear’s eyes and muzzle. You can also color it completely. Draw a smile, claws, outline the ears.

5. Volumetric Christmas tree toy made of paper in the shape of a star

The craft is made in the same way as the previous ones, but you can also add an insert of a different color in the middle.
Cut out 6 stars from paper of the same color according to the template. And 6 slightly smaller stars made of paper of a different color.


Glue the small stars in the middle of the larger ones.

Fold in half.

Glue the half sides together, place a string inside and glue the remaining two halves of the sides together. The star is ready.

This is how the paper Christmas decorations turned out for the Christmas tree. They can be very different, because it all depends on the template used, of which there are thousands on the Internet. The Christmas tree can even be completely decorated with hand-made paper animals, birds, and decorations of various shapes, which are made in the same way as the step-by-step photo instructions for creating three-dimensional objects presented above.
Do you want to decorate your Christmas tree with unusual decorations that you won’t find in stores this year? The only opportunity is to make making New Year's toys fun and interesting. And don't be afraid, it's not difficult at all.
Christmas handmade can be an excellent decoration for your Christmas tree and a nice gift for family and friends. Take your children as helpers and get to work!
DIY Christmas tree decorations will help create a New Year's mood
1. Decoration from cubes

You can write whatever you want on the cubes! Think about what phrase from a Christmas comedy or line from a New Year's song will cheer up your household?
2. Toys made from caps


3. All you need is glitter, spray, paint and tape

And take a stencil with the image of a rooster! Years later, you will remember with what pleasure you had making your own Christmas tree decorations at the end of 2016!
4. Delicious cocoa toys

You probably won’t be able to eat them, but these balls whet your appetite right away!
5. Pencil balls

Does your child love sharpening crayons? Let him do it profitably! Shavings - into a ball, and the decoration is ready!
6. Do you like rustic style? Then these wooden decorations are for you!

Don't forget to draw a rooster!
7. It's just a ball and thread, but how beautiful!
As easy as pie! Even a small child can handle this!
8. Ribbon decorations

Making these Christmas decorations will help your kids quickly learn how to tie their shoelaces.
9. Snowflake made from clothespins

These gorgeous snow flakes are actually 8 clothespins glued together and painted.
10. We don’t skimp on the glitter!

There's no such thing as too much glitter! Especially at Christmas!

A fairy-tale character will come to visit you, but not to steal the holiday, but to decorate it.
12. Another great idea for decorating a Christmas tree!

Spruce twig, wooden beads, letters, white confetti or paper. We place all this in a transparent ball. Ready!
13. Snowman
Do you like to draw? Then this idea is 100% suitable for you.
14. Yarn decoration

Styrofoam balls + sticky glue + yarn + thin wire. And voila!
15. Foam jewelry

Take paint for foam balls with red glitter and apply it to the base. And tie it with a ribbon.
16. Clay star

If you are not a sculptor, use special clay molds.
17. Glitter decoration

Remember the main rule of creating Christmas tree decorations with your own hands? Yes, you can never have too much glitter!
18. Snow crystals

Apply glue to the ball and roll it in salt to create beautiful crystals.
19. Great gift idea for a loved one
Use special stickers.
20. Paper tape + spool of thread. Very nice!
You can write anything! You can list holiday attributes, you can write the words of a Christmas song or fairy tale, or you can exchange wishes with loved ones in this way!
21. Glowing snowman

Neither bright balls from the supermarket, nor lights flashing in different colors, nor expensive designer kits for decorating Christmas trees can compare with homemade decorations.
Of course, such decorations from the supermarket will make your evergreen guest bright and modernly decorated, but they are unlikely to be able to carry the New Year’s mood as joyfully as home-made toys.
There are a lot of ways to make Christmas tree decorations, but the simplest, most attractive and not time-consuming are paper-made toys. To create them, you may need very little, improvised materials that are stored in every housewife. Stock up on a little patience and wings for a creative flight of fancy.
New Year's balls
What is the most common decoration on a Christmas tree? Of course, balls! You can always buy glass and plastic ones in the store, but we will try to make them from thick paper. This includes colored cardboard, old postcards and covers of unnecessary magazines. Balls made of colored cardboard, plain, will give the tree or room that you want to decorate a single style, and multi-colored balls will bring an atmosphere of celebration, magic and a winter fairy tale.
Before you sit down to make a new toy, prepare:
- thick paper;
- use old magazines, cardboards or candy boxes with bright designs;
- glue, PVA is best;
- scissors;
- a compass or any other object that you can trace to get an even circle.
Take your cardboard and draw twenty-one identical circles on it, then cut them out with scissors. Each circle must be folded as follows: bend the circle in half twice, on one side and the other, then straighten it, this will mark the center of the circle.
Fold only one side of it again, so that the edge of the circle is exactly in the intended center. Fold the two sides again, so you get a triangle. Cut out this triangle in one of the twenty circles; it will serve as a kind of stencil for the rest of the circles. All that remains for you is to place the triangle on the remaining circles, trace it and bend the edges of the circles outward along the contour.
Take the first ten circles and glue them into stripes, alternating: five down - five up. Glue the resulting strip into a ring, this will serve as the basis for the toy.
Divide the remaining ten into fives and glue them into a circle. By gluing them together, you will get two lids.
The top and bottom covers will need to be glued to the base in the same way. Consider a loop to hang the toy from.

Children can easily help you make such a New Year's toy: you will need scissors, colored paper, and packing ribbons.


See more:

Today you can find a huge number of different Christmas tree decorations on store shelves, so turning an ordinary Christmas tree into a real holiday beauty is not difficult. However, New Year is a special day! The day when the old year is left behind, and new adventures, new events, new victories lie ahead. But the old year did not pass without a trace, […]
A great idea for a Christmas tree decoration would be a miniature paper Christmas tree. You can make it from thick paper or old postcards, and you can hang your masterpiece on a regular thread.

By the way, if you don’t have a real tree, you can make your own magical New Year tree. For more ideas, see the article:

The New Year tree is, of course, the main attribute of the most important winter holiday. You won’t be able to do without the forest beauty, the atmosphere is not the same, and where will the kind grandfather put the gifts? It just so happens that people in the house decorate a Christmas tree for the New Year holidays: some people put up a live one, some prefer an artificial one, and some prefer a paper one. A paper Christmas tree can not only replace a Christmas tree [...]
Large volumetric snowflake
Snow is obviously the most important attribute of winter, and a snowflake is the main decoration of the house for the New Year. A snowflake can be cut out of paper and glued to the window, as is often done. What about voluminous snowflakes? Making it is as easy as cutting it out. To create it you will only need scissors, a stapler and, of course, paper.

Cut out 6 squares of the same size, fold each square diagonally, and then in half. Make parallel cuts along the folds with scissors. Unfold the squares, wrap the inner strips and fasten them together. The resulting petals are connected to each other with a stapler, although you can also use glue. Such a large snowflake can be sprinkled with sparkles or put together as a garland. You can decorate it with a window, a wall, or hang it under a chandelier.


What could be easier to decorate than large, voluminous paper candies? They are very simple to make, for example, from old foil or beautiful wallpaper left over from renovation. There will definitely be paper with a bright pattern. And to do this, you just need to measure out a small rectangle, twist it into a tube, and tie ribbons at the ends. If you are afraid that your toy will lose its shape, then by twisting it, you can put any unnecessary thing in the shape of a cylinder, for example, a cardboard cylinder from toilet paper, between the paper.

Toys with family photos
Some types of paper balls can be made using family photos. Such New Year's toys will be the most special, because the important and significant moments of the outgoing year will remain with you, and in the next New Year, the toy of memories will again remind you of pleasant moments. By the way, don’t forget about your pets, let them also remain on your memorable toy, because a dog, cat or even guinea pigs are also waiting for the New Year holidays!

Lanterns from childhood
What about flashlights? You must remember from childhood how to make paper lanterns. With a little imagination, you can easily come up with a new design for a simple flashlight. To diversify a very simple craft, you can decorate it with sparkles, make it from colored paper or printed paper, paint it with paints, and add new details. Everything is to your taste.


Paper angels for the Christmas tree
What about New Year's angels? You also remember how to make them, right? Angels can be made from gold paper or newspapers, painted or added glitter.


New Year's paper cones
What's a Christmas tree without pine cones? You can decorate the Christmas tree with ordinary pine cones from the forest, but you can make your own magical ones. There are several ways to make paper cones: it all depends on your preferences, availability of free time and patience. The simplest option is a cone made from old postcards.


You may be interested in:

New Year's holidays are approaching - time to give and receive gifts, decorate the Christmas tree and decorate the house. Perhaps we no longer believe in the good old man Santa Claus, we don’t expect gifts from him under the tree, but we definitely expect a miracle, especially on New Year’s Eve. A miracle is of course good, but the realities of life dictate their own rules to us. Job, […]


Lace garland
A magic lamp can be created from a simple glowing garland; all you need is paper and small scissors, with which you can easily cut out lace snowflakes. You can find patterns for snowflakes on the Internet or print them out so that you can cut out the figures around the office. You can put light bulbs from a garland into the holes cut out in the snowflakes; hanging such a garland on a window or on a Christmas tree will be very beautiful.

A little life hack: if you don’t have time to cut out lace snowflakes, or you can’t make them even and neat, buy lace napkins at the supermarket, this will reduce your work time, and store-bought napkins will look much neater. The garland will create a bright New Year's mood. Feel free to get to work!

See more ideas for garland:

New Year is the most favorite holiday, associated with miracles and magic. Celebrating the new year is characterized by folk festivals and joyful meetings. It is impossible not to love this time of year, when everything around is transformed, and every house or storefront becomes like the scenery of a fairy tale. Everyone wants to participate in this transformation, and therefore they try to decorate their homes […]
Cardboard Santa Claus
You can diversify the decoration of your home and Christmas tree with the help of snowflakes, flowers and lanterns, stars and balls, but what about the most important New Year's miracle - Santa Claus? Small cardboard Santas make a fun garland, especially if you add different facial expressions to the grandfathers.

To make the job easier, you can find stencils for making toys that you just need to cut and glue.

New Year's house on the Christmas tree
You can decorate the New Year tree with a paper house. This toy looks especially cool if you put an electric candle or a garland light bulb inside. Then the windows of the house will glow, as if someone lives in it. Making paper houses is very simple; you can do without a template. You will need paper or old postcards, scissors and glue.


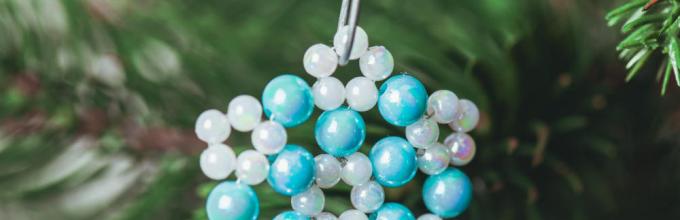
Stars
You can decorate the Christmas tree with paper stars. They are made very simply, even kids can cope with this task, but they look very original!


A New Year or Christmas wreath is usually decorated with the front door or hung on the wall. But you can make a mini paper wreath that will look great on the Christmas tree as a toy.

The toys that you made for the holiday with your own hands are the key to a cozy holiday atmosphere. Happy New Year!
Help us improve: if you notice an error, select a fragment and click Ctrl+Enter.


