Now the back and front of the product are already ready, and you need to move on to the next part of the work - knitting the sleeves, however, sometimes knitting the product begins with the sleeve.
Sleeves come in a wide variety of varieties: short and long, straight and tapered, plain and multi-colored, with ruffles and slits. The sleeve must first of all correspond to the overall style of the product, be it a sweater, cardigan, cape or other wardrobe elements.
There are many ways to perform this detail. For example, you can knit a sleeve from bottom to top or from top to bottom, from left to right and vice versa, and even diagonally - here it’s up to you as you like.
The sleeve can be knitted from the top from the neckline - raglan.
The sleeve can be a separate part of your wardrobe, that is, knitted separately from the main product.
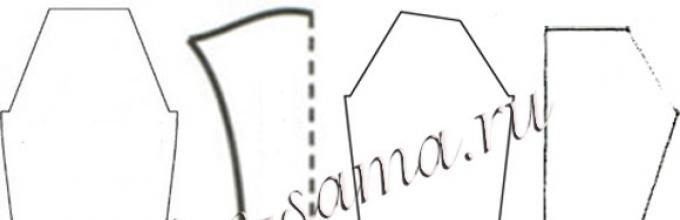
Several sleeve options:

Let's consider the most common traditional sleeve, which can be crocheted or knitted.
How to knit a sleeve with knitting needles
First of all, you need to decide which sleeve is required. This refers mainly to its length and shape. If you have a sleeve pattern, you need to follow it. If not, you can do all the necessary calculations yourself. (Remember that they are only made for half the sleeve, since the other half is completely symmetrical).
Count the number of stitches in the widest and narrowest parts of the sleeve, and also measure the distance from the beginning of the flare. By dividing this distance by the difference in loops, calculate how often you will need to add loops for the bevels. They must be added symmetrically on both sides of the sleeve according to the calculations made - for example, every sixth row.
 Loops for bevels by throwing a twisted thread onto a knitting needle (yarn over), but with this option you get holes, albeit small ones. You can lift the loop from the broach of the previous row or by the bow of the loop of the previous row.
You should write down your calculations and do not throw them away after you finish knitting a sleeve; they may be needed for the second one.
Then, get to work. First, an elastic band is knitted - a cuff, 1x1 or 2x2 (that is, in each row, alternate knit and purl loops, one or two, respectively). The height of the cuff depends on your desire, add the first loops for bevels on both sides, and then, following the previously drawn up plan, knit a sleeve of the desired length until you reach
The sleeve roll is performed as follows: the height of the sleeve should be divided into three equal parts and three different rectangles should be built, as shown in the figure below.
The vertices of the triangle divide the edge line into four completely different design lines: concave, flat, convex, horizontal. For each of them, the loops need to be closed differently.
So, the first calculation line is concave, consider the corresponding triangle: there are twenty-one loops at its base, and twenty rows in height. (Since there are twenty rows, we have ten closing groups - each front row). To get a concave line, you first need to close a larger number of loops and gradually reduce this number. The casting order can be as follows: 4, 3, 3, 3, 2, 2, 1, 1, 1, 1 (a total of twenty-one stitches).
The next triangle has nine loops at the base and again twenty rows in height. To make the line slanted, you need to close the loops evenly. Cast off one stitch in each knit row (last knit row - no decreases).
The third triangle has 18 loops at the base and the same height. The result should be a convex line, so the closing order is: 1, 1, 1, 1, 1, 1, 2, 3, 3, 4.
The last six loops in the fourth part of the okat are closed in one row, which completes the knitting of the sleeve.
After this, the sleeve should be steamed and it is ready for assembly.
Sleeve option and calculation for knitting it:

How to crochet a sleeve
The principle of crocheting a sleeve is the same as knitting, but there are exceptions, for example, when knitting with motifs, Irish lace, etc. Another way to knit a sleeve is from the armhole.
It’s easier to knit using a ready-made pattern, which you can build yourself, based on your own dimensions and calculations.
You can knit a sleeve either with a seam or without a seam (in the round). Here you also need to remember about adding loops, which are made on the same line (for an aesthetic appearance, and so that the pattern does not go astray).
If the sleeve is made in straight and reverse rows (option with a seam), then it is better to add loops at a distance of 2-3 loops from the edge of the sleeve.
If in a circle, then the principle is the same. But I would advise not to bother and knit the sleeve with a seam.
Adding loops is done by knitting two stitches from one.
Okat. Here we need to close the loops. If you need to decrease one loop (stitch), just knit two stitches together (unfinished stitch). If you need to close several loops, then follow the pattern to save it.
There is an option not to knit at all, but to retreat the required number of decreasing stitches and start knitting the next row, but do not forget to make planned transitions so that you don’t get a “ladder”, you won’t be able to beautifully sew the sleeve to the armhole in the future.
There are patterns when knitting which do not require additional loops; the fabric itself expands due to the pattern.
After the entire sleeve is knitted, it also needs to be steamed and sewn.
That's all the subtleties that can be associated with knitting sleeves. This is not a difficult matter and not at all troublesome, especially if you draw up instructions for yourself in advance on how to knit. Good luck!
Not the last place in a knitted product is occupied by the sleeves, because they are the ones who give the item a complete look. Most often, inexperienced needlewomen find it difficult to make a set-in sleeve, since a good fit requires precise calculation of the roll and decrease along the armhole line. If knitting a sleeve is also a difficult task for you, use our advice, substituting the required dimensions into the proposed calculations.
How to knit a sleeve with knitting needles - measurements
We will knit a 3/4 sewn-in sleeve from the bottom up, but first, take measurements and make calculations.
- Measure the circumference of your arm at the bottom edge of the sleeve, let’s say it’s 24 cm and the wide area below the armpit is 40 cm.
- Knit a sample measuring 10 by 10 cm and count the number of loops horizontally and rows vertically.
- Let's say you succeeded - 24 p. for 33 rubles. Accordingly, make a proportion and calculate the width of the sleeve (in loops) from the bottom (A A1):
10 cm – 24 p.
24 cm – X p.
It turns out: 24 x 24: 10 = 57.6 p. Round in the desired direction, for example 59 p.
- Similarly, find the top part (B B1) - 40 x 24: 10 = 96 p.
- Determine the expansion of the fragment by making the following calculations: (96 – 59): 2 = 18.5 p., which means you will add that much on each side of the sleeve.
By the way: you don’t have to calculate the increase in stitches by row, but try the traditional method - add 1 stitch at the beginning and end of every sixth row.
How to knit a sleeve with knitting needles - calculating the cut
The collar is the upper rounded edge of the sleeve, which along the armhole line connects the back and the front. Make a pattern for 1/2 of the sleeve, taking half the loops of the widest part of the arm - 96: 2 = 48 sts. Draw a diagram similar to ours, but with your own data.
- Divide 48 sts into three = 16 sts. Divide the first part in half and close in the first part two times with 3 sts, one with two, and in the second four times with 2 sts.
- In the second part - 1 stitch on 2 sides in every second row.
- Divide the loops of the third part into triplets; if there is a remainder, add it to the center of the sleeve and close - 4 times 3 stitches each. Knit the remaining loops in one step.
Tip: close the armhole and the hem equally, then they will sit evenly in the armpits.


How to knit a sleeve with knitting needles - sewing
The sleeve is knitted, all that remains is to sew it in correctly. How to do it? Memo:
- Sew the sleeve and mark the middle of the collar, then turn the item inside out and insert the sleeve into the armhole. Align the center of the sleeve with the shoulder seam;

- Sew from the bottom along the wrong side from the side seam to the end of the rounded part of the armhole;


- turn it over to the other side and work on the face to control the process;


- Sew on, grabbing 2 loops on the back and the same number on the sleeve. If it gathers somewhere, take three or four loops in one needle step, then the fit will be smooth and the center of the collar will coincide with the shoulder seam;


- along the front, work with purl stitch until the armhole is rounded (the principle is the same as in the previous paragraph). Turn the fabric inside out and sew with a regular seam.


The sleeve is sewn on. Repeat the manipulation with the second workpiece and consider the job done.

Now you know that knitting a sleeve is not difficult. The most important thing is to take measurements correctly, stick to the created pattern and carefully connect the parts.
When starting to knit a new sweater, each knitter, as a rule, already has an idea of the appearance of the finished product. But you need to determine not only the style, yarn and patterns. It is extremely necessary to approach the issue of patterns very seriously.
Sleeves are the most important detail
After all, if the silhouette on paper is inaccurate, then the details will be very difficult to put together. As for the parts themselves, there are almost never any problems with the main fabrics, but the sleeves should be given special attention.
Variety of models and techniques
There are a huge number of models of knitted clothes with different shapes and sleeve knitting techniques.
And in this article, we will try to figure out what sleeve models exist and how to knit a sleeve.
Sleeve shape
If we talk only about the shape of this part, then the sleeves can be either narrow or wide, straight or flared, long and short. In general, there are a lot of options. But in addition to the form, there is also the style of the product. And it is this style that fully determines how the finished sleeve should look. So, let's figure out what types of sleeves exist.
Sleeve models
Set-in (it is possible to use a lower armhole);
sleeve “without piping line”;
sleeve “with small armhole”;
sleeve “with shoulder straps”;
"raglan";
"bat";
"flashlight";
"kimono".
Despite the fact that all these styles are similar in structure, the knitting technique for each of them is quite specific. Therefore, I would like to dwell on the review of each model.
Set-in sleeve
This sleeve style can be crocheted or knitted. The main feature is the calculation of the order of decrease in loops when knitting the sleeve cap and the armhole of the main fabrics. For an accurate determination, first, knit a sample of the main pattern and measure the density of the loops. After this, the pattern is transferred to graph paper and all the calculations are made.
We knit a set-in sleeve with knitting needles, usually from the bottom. Therefore, for this part of the work you need to choose light straight knitting needles of the required diameter. When the elastic is knitted to the desired height, the addition of loops begins. The calculations are much simpler here. It is enough to subtract the sum of the stitches of the cast-on row from the number of stitches at the beginning of the lambing of the sleeve. As for the frequency of increases. It is necessary to calculate, based on the density, the number of rows to knit and distribute the additional loops evenly. At the armhole, decreases are made at the very beginning of the row.
Here is the simplest example of decreases:
first, 2 rows: decrease by seven loops;
third, 4 rows: decrease by five loops;
fifth, 8 p.: decrease one loop at a time.
After all the decreases have been made and the required number of rows have been knitted, you need to knit the okat. As a rule, decrease three loops from each edge three times. In the last row, all remaining loops are closed. It is better to do the work wearing an oversleeve.
This type of sleeve can be found in knitting quite often. The hem line of this model is knitted straight, due to the fact that there is no armhole line. Calculations of the increase are made following the example of a stitched sleeve, and for correct joining, large parts are also knitted with straight edges, before the neckline begins to be cut.
Sleeve with shallow armhole
The only difference between this style is that the depth of the armhole and the hem line are narrowed. The rest of the sleeve can be knitted using the basic pattern.
Sleeve with shoulder strap
 Sleeve with shoulder strap
 These sleeves are more often found in products with a pattern of ornaments. “Epaulette” conveys a certain completeness of the pattern itself and the product as a whole. The width of the “epaulet” directly depends on the chosen ornament. The difference between this model and the previous ones is precisely the presence of a “shoulder strap”; it is an addition to the details of the shelf and back. All calculations are no different from the above examples.

We knit this sleeve style both at the top and bottom. If you start knitting from the bottom, then the principle here is the same as when creating a “set-in” sleeve. When the required length is knitted, the lowering of the loops begins. This is usually done through a row, knitting one loop out of two, before and after the edge loop.
When knitting “raglan” on top, it is better to choose circular knitting needles of the required diameter as a tool. The number of loops cast on on top should be a multiple of 6. You also need to take into account the presence of a collar in the product. If it is provided in the product, then you should start knitting from the top with it. If not, then increases along the raglan lines can be made from the very beginning. Knitting is not distributed by 4 knitting needles, but the 5th is the working one.
Raglan sleeves, as a rule, make up a sixth of the total number of loops in the product, the third is left for large details. Therefore, if the total amount of loops is not a multiple of six, the extra ones need to be distributed between the front and back parts. Adding loops on top is done on all parts at once. Example of a raglan stitch: purl loop, yarn over, two knit stitches, yarn over, purl loop. It should be noted that the yarn over and purl loop are on the front and back pieces, and all other loops are on the sleeve. When the armhole comes to an end, you should knit without increases or decreases (with straight fabric). When the required length is reached, all loops are closed. It is better to do the work wearing oversleeves.

Pullovers with such sleeves are usually knitted from the lower back and front. In rare cases, knitting begins with sleeve elastic. If you start with large pieces, then you need to knit a straight fabric before the start of the armhole. The additions at the beginning of the armhole do not have to be done right away. You can cast on the required number of loops at the beginning of one row and do the same in the next, and this addition can be done 2-3 times. When knitting a product “from the sleeve”, the sleeve is knitted like a stitch. Then loops are cast on for large parts. The key feature of this style is the mirror image of the details. The loops are closed in the order they are cast on. It is better to do the work wearing oversleeves.

The main feature of this type of sleeve is the creation of a tight cuff. A tight cuff is necessary for the flashlight to keep its shape. In this case, the addition of loops occurs evenly, and their total number at the end should exceed the initial set by three or even four times. Only in this case will the “flashlight” turn out magnificent. The required number of loops is calculated based on the density of the thread. After all, if the thread is too soft, the sleeve will simply hang.
First you need to link a sample of work, taking into account the progress of additions. It is better to mark the increases; this will help when working with the second “flashlight” and it is more convenient to do this with colored markers or pins. When making an okata, it is better to use a pattern; this will minimize errors in knitting, and the shape will be correct.
It is also necessary to take into account in the work that the edge of the armhole should be rounded. Depending on how the sleeves are knitted, the curves can be convex or concave. In the first case, there is usually a sequential increase in loops. In the second case, the loops are decreased and closed in the reverse order (5th, 4th, 3rd, etc.). But in addition to this, you also need to take into account the height of the armhole itself, which should coincide with the height of the rim of the “flashlight”. It is better to do the work wearing oversleeves.
Kimono sleeve
This model is one of the simplest in terms of execution technique. She is also without lambing.
To cast on the stitches of the initial row, first determine the starting point of the armhole. Then, in several stages, groups consisting of five or more loops are assembled. The number of techniques directly depends on the expected length of the sleeve. We knit on all loops until a height equal to the width of the sleeve is reached. Then the decreases begin. Deductions should be made in the same way as additions, only in reverse order.
Another feature of products with kimono sleeves is the V-shaped neckline. Its knitting usually begins with increases. Increases are made to round the transition of the armhole to the side seam. It is extremely rare that I knit this neckline in accordance with the desired depth.
And, based on this, the beginning of the sleeve is located in the very middle of the side seam; adding loops here is necessary to round off the place where the side seam goes into the armhole, and then into the sleeve seam. They usually add one loop at a time in several rows.
These are not all existing models. In fact, each model of any product is unique. The above are just basic descriptions and notes.
The desire to write this entry arose after the questions - how do I knit a sleeve so that it fits so well?
I have been knitting for a long time, since I was 12 years old, and my main teacher was M.V. Maximova’s book “The ABC of Knitting”. It was from this book that I learned how to knit armholes and sleeve caps correctly. Of course, each product requires some changes, but the basic calculations always remain the same.
If you take this method as a basis, then very soon you will have neat set-in sleeves.
I wish everyone good luck
Calculation and knitting of sleeve cap.
To calculate and knit an okat, it is most advisable to use a technique developed by practice. Whatever yarn you use and whatever number of needles you knit from, this technique gives fairly accurate results. Depending on the knitting density, only the number of calculation numbers changes: the looser the fabric, the fewer there are.
Let's take a look at this calculation. Divide the number of loops in segment AB (Fig. 174) into 3 equal parts (54 p. : 3 = 18 p.). If there is a remainder, then attach it to the 1st part. Next, divide the loops of each part into groups.
Rice. 174 Calculation for knitting an okat
Divide the loops of the 1st part into threes and twos, with the first half into threes, the second into twos (3 + 3 + 3 + 2 + 2 + 2 + 2 = 17), add the remainder to the first number (3 + 1 = 4 ).
Divide the loops of the 2nd part into units (18 units); loops of the 3rd part - into triplets (3 + 3 + 3 + 3 + 3 + 3 = 18). If there is a remainder, add it to the first number, counting from the high point of the circle (point O).
Apply the calculation results to the pattern.
Now you can start knitting the okat.
At the beginning of the front row of the 1st part (point B), fasten 4 loops in a row and knit the row to the end. Turn the knitting and at the beginning of the purl row also fasten 4 loops. Then continue casting off stitches at the beginning of each row (knit or purl) until you have reduced 18 stitches on both sides of the sleeve.
The first third of the loops of the 2nd part (18 sts: 3 = 6 sts) decrease 1 loop at the beginning and end of each front row. Cut the second third (6 loops) in the same way, but not in each front row, but every other row. Decrease the last third (6 stitches) in the same way as the first.
Fasten the loops of the 3rd part according to calculation in exactly the same way as in the 1st part: either at the beginning of the front row, or at the beginning of the purl row. When there are 6 loops left on the knitting needle (of which 3 loops on the right side of the okat plus 3 loops on the left), close them in a row.
When knitting set-in narrow sleeves, a certain pattern is observed, which is advisable to take into account. Noticed: if the arm length measurement is 52-60 cm (with normal fullness of the arms), then increases on the sleeve have to be made in every 6th row. If, with the same fullness of the arms, the length measure is 48-51 cm (short arms), then a different rhythm of additions is necessary - once in the 6th row, once in the 4th. With full and short arms (48-51 cm), loops on the sleeve should be added every 4th row. Knowing this, you can avoid calculating the additions according to the pattern, but knit the sleeves taking into account these practical conclusions.
In knitted products, different styles of sleeves are used - set-in (including with a low armhole), one-piece, raglan, puff, “flashlight”. When knitting a set-in sleeve, some difficulties with the pattern may arise, so raglan and one-piece, reminiscent of a “bat”, are becoming increasingly popular.
Photo by Shutterstock
Set-in sleeve
This sleeve can be crocheted or knitted. When knitting an armhole and a collar, it is important to correctly calculate the order in which the stitches are decreased. Even if you decide to come up with a model yourself, it is better to use a ready-made pattern from a magazine. Convert it to graph paper. The patterns must be checked periodically. Knit a swatch of rib and warp stitch. Measure the sample vertically and horizontally, count how many loops there will be in 1 cm of a row and how many rows in 1 cm in height. You need to calculate the number of loops for the elastic band, for the beginning of the main pattern, for the width of the sleeve along the armhole line, as well as the order of adding along the seam and decreasing along the hem.
A set-in sleeve is always knitted from the bottom, that is, from the elastic. It is better to perform it on straight knitting needles. Knit the elastic straight to the desired height. Determine how many stitches you need to add from the top of the cuff to the bottom of the armhole. From the estimated number of stitches that should be at the level of the beginning of the okat, subtract the number from which you start knitting. Also calculate how many rows you should have and after how long you will add loops. You need to add loops symmetrically, at the beginning and end of the row. Having knitted to the armhole, decide on the order of decrease. Decrease is done at the beginning of the row. The simplest option looks like this:
- Rows 1 and 2 – decrease 7 stitches each;
- Rows 3 and 4 – 5 loops each;
- Rows 5-8 – 1 loop each.
Next, knit straight, checking the pattern. When you need to knit the okat itself (which is the last 4-6 rows), decrease 3 loops on each side. On the last row, bind off the middle loops. Try on the sleeve at the armhole.
The order of decreasing loops is calculated for each model separately
Knitting a sleeve: how
Photo by Shutterstock
Raglan sleeve
This sleeve can be knitted both at the top and bottom. If you start doing it from an elastic band, knit the beginning in exactly the same way as for a set-in stitch. Having reached the armhole, begin lowering the loops. This is done through a row. Knit 2 loops together after the initial edge and before the final one. It is better to knit raglan from the neckline on circular knitting needles. The number of loops must be divided by 6. The product can be either with or without a collar. In the first case, the collar is knitted first, in the second, increases are immediately made along the raglan lines. Knitting needs to be distributed over 4 knitting needles (the fifth working one). The sleeves account for 1/6 of the total number of loops, the front and back - 1/3 each. If the total number of loops is not divisible by 6, distribute the extra ones evenly on the front and back.
The increase is made simultaneously for all parts. The pattern for the raglan line looks like this: 1 purl, 1 yarn over, 2 knits, 1 yarn over, 1 purl. In this case, the purl, yarn over and 2 knit stitches are located on the sleeve, and on the front and back - the yarn over and purl. Having tied to the bottom of the armhole, make the bottom of the sleeve with a straight fabric or in a circle.


