In cold weather, parents always think about what kind of clothing could keep their child as warm as possible without hindering his movement. A knitted sleeveless vest in this case is the best solution! Knitted from high-quality threads, it will reliably retain heat and at the same time provide air circulation, protecting against overheating. In addition, knitting sleeveless vests for children is a very exciting and easy activity. You can choose the right model - for walking, for school or for sports. The appearance of the sleeveless vest is also very important, because children love beautiful things. We offer you several interesting options for sleeveless vests.
Pink sleeveless vest for girls
Size: for a 4 year old child.
We will need:
- yarn, 100% merino wool, (50g per 105m) – 200g;
- auxiliary thread of contrasting color;
- knitting needles No. 3.5 and No. 4;
- buttons to match the color of the yarn - 2 pieces.
Patterns and techniques:
- purl smooth surface: in faces. R. Purl all stitches, purlwise. R. – facial;
- rice pattern:
1p.: *1l., 1i.* - from * to * repeat on all loops;
2p.: according to the visible pattern;
3p.: *1i., 1l.* - from * to * repeat on all loops;
- “braid” pattern: see Fig. 1;
- “rhombus” pattern: see Fig. 2;
- Italian set of loops: cast on the required number of loops with an auxiliary thread, knit 1 p. facial Then we knit 1 row with the main yarn. purl p. and 4p. with a hollow elastic band (1l., 1l., remove the thread without knitting before work). We will later weave the auxiliary thread.
Density: inside out satin stitch 23p. for 32r. equal 10cm by 10cm.
Description
Back
We start knitting with an Italian set of knitting needles No. 3.5 87p. We knit 6p. "rice" pattern. Then we go to sp. No4 and knit: 1 cr., 15 p. purl Ch., 10p. “rhombus”, 1i., 2l., 2i., 9p. "braid", 5i., 9p. “braid”, 2i., 2l., 2i., 10p. "rhombus", 15p. purl Ch., 1 cr. According to this pattern, you need to knit with 22cm knitting needles. The diamond pattern needs to be completed at the top of the second diamond, in the last face. R. knitting instead of 2 crossed faces. p. 2p. in 1l. At the same height, 22cm, we finish the “braid” pattern and then these 9p. knit in stockinette stitch.
For the raglan line, close 3 stitches on both sides. and then in every even p. we make decreases 23 times by 1 point:
right side – 1cr., 1l., 2i., 2p. in 1i.;
left side - for 6p. to the end of the river: 2p. in 1i., 2i., 1l., 1cr.
Close the remaining steps.
Before
We knit this part of a sleeveless vest for children in the same way as the back. At 35cm for the neckline we close the central 11p. and we finish each part separately. We close the cutout on each half in even rows 1 time in 3 stitches, 1 time in 2 stitches, 1 time in 1 stitch.
Sleeve
We start knitting with an Italian set of knitting needles No. 3.5 53p. You need to knit 2p on them. "rice" pattern. Then we go to sp. No4. We continue knitting: 1cr., 1l., 2i., 2p. in 1i., 5i., 2l., 2i., 9p. "braid", 5i., 9p. “braid”, 2i., 2l., 5i., 2p. in 1i., 2i., 1l., 1cr. For the “braid” you need to knit only one repeat, then continue with knitting. satin stitch In each trace. even p. make decreases for the raglan according to the description of the back 18 times, 1 p. The remaining 17p. close.
Assembling a children's vest
Sew side and raglan seams. For the rolled-out collar using knitting needles No. 3.5, we raise the loops by making an overlap of 4 sts on the raglan line on the right side. Knit the collar at 7cm height. Let's go to sp. No4 and continue knitting another 7cm. At the required height, we make buttonholes for buttons, knitting through 3 stitches. from the edge 1 yarn over, 2 p. in 1p. Sew on the buttons.
How to knit a children's sleeveless vest: video master class
Sleeveless vest with a kitten
For children 2-3 years old.
We will need:
- yarn, at least 50% wool, (100g per 200m), yellow – 100g;
- the same mustard color – 50g;
- some black yarn for embroidery;
- sp. No4;
- hook No.3.
- persons smooth surface: in faces. R. Knit all stitches, purlwise. R. - purl;
- elastic band: 2l.x2p;
- pearl pattern:
1p.: *1l., 1i.* – repeat from * to *;
2p., 4p., - according to the drawing;
3p.: shift the pattern by 1p. - above persons. knit purl, over purl. – facial.
Repeat from 1 p. 4 rubles each
Description
Back
We begin knitting the back of a sleeveless vest for children with a set of 70p mustard-colored yarn. Next, you need to tie an elastic band at 4cm. Then we move on to yellow yarn and faces. smooth surface At 17cm from the bottom we close the armholes on each side with 6 stitches. and continue knitting the children's vest for exactly another 12 cm. We close the central 22p. and then we knit both sides separately. To round out the rollout, we close it in the trail. 2nd r. 1 time 1 p. Close all stitches 15cm from the bottom of the armholes. The second half of the back of the sleeveless vest for children needs to be knitted in a mirror image.
Before
We start knitting the front of a sleeveless vest for children with a set of mustard-colored yarn 70p. Next, you need to tie an elastic band at 4cm. Continue with a pearl pattern for 5cm. We change the yarn to yellow, and knit further according to the description of the back. Close the central 18 stitches 10cm from the bottom of the armholes. and we finish each part separately. To round the neckline, close it in every even row. on the inside 1 time in 2 p. and 1 time in 1 p. We close the remaining stitches at the height of the previous part. We tie the second half of the front in a mirror manner.
Assembling a children's vest
We raise sts along the shoulders of the back with yellow yarn and knit a 2cm elastic band. We raise sts along the front shoulders with mustard yarn and knit a 2cm elastic band. We make holes for buttons on each shoulder, closer to the neck: 2p. in 1p., 1n.
We sew down the sides, the short sides of the elastic bands on the shoulders along the edges. Step by step we tie mustard yarn around the armholes and neckline. We embroider the kitten with black yarn using a loop-to-loop stitch pattern.
Knitting a children's vest (sleeveless vest): video MK for beginners
Selection of schemes


In the autumn season, you really want to pamper your child with something pleasant and warming. For example, you can knit a warm and beautiful vest for a girl with your own hands. Both knitting needles and a crochet hook are suitable for this. Even beginning needlewomen can knit a vest for a girl; you just have to follow the diagram and description, and everything will definitely work out. Let's consider several options for different models of vests.
Knitted vest for girls - diagram and description
Classic sleeveless vests, vests with hoods, with or without buttons, with high collars - there are many varieties of vests that will suit a girl and at the same time be practical in the cold season.
The main thing is to choose a vest model that the girl will really like. After all, in this thing the child will go to kindergarten or school, where she, like any girl, wants to feel the most beautiful. To make the choice easier, let's look at different patterns and descriptions of knitting a vest for a girl.
Knitted vest for girls for beginners

You can start knitting a vest for a girl for beginners with this model. This hand-knitted vest for girls is perfect for any outfit and will protect your child in cold weather. A big plus is the presence of buttons and a hood.
Vest size: 74/80 (86/92) 98/104
Popular articles:
For the vest you need: yarn (55% cotton, 45% polyacrylic; 140 m/50 g) - 100 (150) 200 g light gray and 50 (50) 50 g red; knitting needles and long circular knitting needles No. 3.5; 5 buttons with a diameter of 16 mm.
Mating: shawl Knit front and back rows.
Knitting density: 19 p. x 42 r. = 10 x 10 cm.
Pattern:

Back
Using red thread, cast on 59 (67) 74 sts and knit in garter stitch.
For armhole cutouts, 18 (21) 24 cm from the initial row on both sides, close 2 stitches and in each next 2nd row. decrease on both sides another 2 (3) 4 x 1 p. = 51 (57) 62 p.
After 30 (34) 38 cm from the initial row, close all the loops. The middle 27 (29) 30 sts form the neckline, the outer 12 (14) 16 sts form the shoulders.
Left shelf
After 1 cm, continue knitting with garter stitch with light gray thread.
For button holes, retreat 2 stitches from the front edge and knit 2 stitches together, 1 yarn over. In the purl row, knit a yarn over. Make the first hole for the button 2 cm from the starting row, the rest - at intervals of 6 (6.5) 7 cm = 24 (28) 30 r.
At the same time, for the armhole, after 18 (21) 24 cm from the initial row from the right working edge, close 2 stitches and in each next 2nd row. decrease another 2 (3) 4 x 1 p. = 28 (31) 34 p.
To cut the neckline, after 27 (30) 33 cm from the initial row from the left working edge, close 5 (6) 7 p. and in each next 2 p. close off another 1 x 3 p., 2 x 2 p. and 4 x 1 p.
Right shelf
Using red thread, cast on 32 (36) 40 stitches and knit in garter stitch.
After 1 cm, continue knitting with garter stitch with light gray thread.
For the armhole, after 18 (21) 24 cm from the initial row from the left working edge, close 2 stitches and in each next 2nd row. decrease another 2 (3) 4 x 1 p. = 28 (31) 34 p.
To cut the neckline, after 27 (30) 33 cm from the initial row from the right edge, close 5 (6) 7 p. and in each next 2 r. close off another 1 x 3 p., 2 x 2 p. and 4 x 1 p.
After 30 (34) 38 cm from the initial row, close off the remaining 12 (14) 16 stitches for the shoulder.
Hood
Using a light gray thread, cast on 58 (70) 80 sts and knit in garter stitch.
For side bevels in each next 16 (12) 10 r. on both sides decrease 4 (6) 8 x 1 p. = 50 (58) 64 p.
After 16 (18) 20 cm from the initial row, close all the loops.
Assembly
Stretch the parts according to the pattern, moisten and let dry.
Use a mattress stitch to sew the shoulder seams.
For the straps along the edges of the armholes, use red thread to cast on 48 (52) 56 stitches on the knitting needles for each strap and knit 1 cm in garter stitch. Then loosely close all the loops.
The side seams and the seams of the slats are made with a mattress seam. The top seam of the hood is made with a mattress seam. Sew the hood to the neck using a mattress seam.
For the stripes along the edges of the shelves and along the edge of the hood, using red thread on circular needles No. 3.5, evenly cast on 156 (190) 204 sts and knit 1 cm in garter stitch. Then loosely close all the loops.
Sew buttons.
Children's vest for school with a pattern

A children's vest knitted for a girl is a pleasure for both the needlewoman and the baby. After all, going to school wearing a beautiful thing that your mother or sister lovingly knitted is a reason for joy every day.
Vest size: for ages 2 (4) 6 (8) 10 years.
For the vest you need: yarn (100% wool; 50 g/100 m) – 2 (3) 3 (3) 4 skeins pale green, 1 (1) 1 (1) 1 skein yellow, 1 (1) 1 (1) 1 skein pale -pink; circular knitting needles No. 4 and 5, length 80 cm; for making buttons 4 rings for curtains with a diameter of 11 mm.
Bust width: 56 (60) 64 (68) 76 cm.
Vest length: 32 (35) 38 (41) 44 cm.
Knitting density: 16 p. x 22 r. = 10 x 10 cm, knitted with a pearl pattern.
Important: up to the armholes, the product is knitted on circular needles in rows in forward and reverse directions in a single fabric.
Pearl Pattern: 1st r. (= purl row): *K1, P1*, repeat from * to * until end of row.
2nd row: knit stitches according to the pattern (knit stitches - knit stitches, purl stitches - purl stitches).
3rd row: *P1, k1*, repeat from * to * until the end of the row.
4th row: knit stitches according to the pattern (knit stitches - knit stitches, purl stitches - purl stitches). Repeat these 4 rows.
Back and shelves
On knitting needles No. 4, cast on with a pale pink thread 128 (139) 150 (161) 172 sts and knit 2 rows. facial Switch to a pale green thread and knitting needles No. 5, knit 1 r. facial (= faces row). Continue working with the pearl pattern and knit until the length of the product is 6 (7) 8 (9) 10 cm, finishing with knits. near. Move the loops to the other end of the knitting needles, switch to needles No. 4 and turn on the yellow thread, knit 4 rows. facial, evenly decreasing in the 1st row. loops up to 97 (105) 113 (121) 129 sts on knitting needles.
Then switch to needles No. 5 and a pale green thread, knit 1 r. knit stitches and continue working, distributing the pattern loops in the following sequence: 1 (0) 4 (3) 2 stitches of pearl pattern, *5 stitches of stockinette stitch, 5 stitches of pearl pattern*, repeat from * to *, finish 5 stitches. stockinette stitch, 1 (0) 4 (3) 2 p. pearl pattern.
When the length of the part is 17 (20) 23 (26) 29 cm (last row = purl row), bind off the loops for the armholes on both sides: knit 21 (23) 25 (27) 29 sts, bind off 6 sts for the armhole , knit 43 (47) 51 (55) 59 sts, bind off 6 sts for the second armhole, knit 21 (23) 25 (27) 29 loops.
Left shelf
On the loops of the left front, continue knitting, decreasing from the inner edge to form an armhole in every 2nd r. 3 times 1 p. Perform decreases before edging. loop, knitting 2 stitches together according to the pattern - knit crossed or purl crossed. After this, 18 (20) 22 (24) 26 sts will remain on the knitting needles. Then knit straight until the armhole height is 6 cm.
From the outer edge, temporarily leave the outermost 7 (8) 9 (10) 11 stitches for the fastener bar and continue knitting on the remaining loops.
To form a neckline from the outer edge, decrease every 2nd r. 4 times 1 p. = 7 (8) 9 (10) 11 p. Continue knitting straight until the armhole height is 14 (15) 16 (17) 18 cm. Then close the loops.
Right shelf
Knit similarly to the left one, but in a mirror image, attaching the thread from the wrong side to the left loops of the right front.
Back
Attach the thread to the left back loops on the wrong side and knit as follows: 3 times in every 2nd r. decrease 1 stitch on both sides = 37 (41) 45 (49) 53 stitches left on the needles. Then knit straight until the armhole height is 12 (13) 14 (15) 16 cm.
Temporarily leave the middle 19 (21) 23 (25) 27 sts and finish both sides separately.
From the inner edge to form the neck, decrease every 2nd r. 2 times 1 p.
Armhole straps
Along the edge of the armhole on the front side, cast on 45 (49) 53 (67) sts with yellow thread and knit 2 rows. facial Close the loops in the purl row.
Make the second armhole plank in the same way.
Sew shoulder seams, including trims.
Neck trim
Knit with needles No. 4 using pale pink thread. From the front side knit the left 7 (8) 9 (10) 11 sts on the right front, cast on 10 (12) 14 (16) 18 sts along the edge of the neckline to the shoulder seam, 4 sts from the shoulder seam to the left back stitches , knit the left 19 (21) 23 (25) 27 sts of the back, pick up 4 sts to the shoulder seam, 10 (12) 14 (16) 18 sts down to the left stitches of the left front and knit them = 61 (69 ) 77 (85) 93 p. perform 2 p. facial Close the loops in the purl row.
Left clasp strap
With a yellow thread, cast on from the front side along the front edge of the left edge of the loop - at the rate of approximately 3 sts out of 4 p. = 50 (54) 58 (62) 66 p. Do 2 p. facial Close all the loops in the purl row.
Right clasp bar
Cast on the loops along the front edge of the right shelf with a pale pink thread = 50 (54) 58 (62) 66 p. Work 1 p. facial In the next row, make holes for buttons: 18 (19) 20 (21) 22 knit, *knit 2 sts together, cast on 2 new sts, knit 2 sts together, 5 (6) 7 (8) 9 knit.*, repeat from * to * 3 times, finish: knit 2 sts together, cast on new 2 sts, knit 2 sts together, knit 1. In the purl row, close the loops by knitting new loops 1 knit, 1 purl.
Embroidered flowers
Each flower consists of 4 stitches of a stitched stitch (= petals) and a double cross stitch in the middle. Embroidery should be done only on the shelves, color distribution - see photo. Fasten the ends of the threads.
Buttons
Make 4 buttons: sew the rings over the edge with 18 stitches of a laget seam. Then, inside each ring, use a contrasting thread to make a “web” of three large intersecting stitches and “darn” them with a “back needle” seam, placing a stitch behind each of the 6 rays of the “web”. Sew buttons.
Wash the product, lightly wring it out, lay it out and leave it to dry.
Crochet vest for girls
Among the unusual and practical things that can be crocheted, of course, there are vests. There are many varieties of them - from complex ones to those that beginners can knit. The big advantage of choosing crochet is speed, so if you urgently need to knit an insulated cape for your child, crochet is the most suitable option.
A simple model for beginners

A crocheted vest for a girl is quite complex to make, but it always looks unusual and interesting. This vest will refresh your baby's look. Knitting a vest for a girl for beginners may seem difficult, but let’s try to figure out the pattern and description together. And if it’s too difficult, we’ll use video tutorials.
This vest model is made with motifs from section-dyed yarn.
Vest size: 3-4 years.
For the vest you need: Nako Spaghetti Effect yarn - 4 skeins (25% wool, 75% acrylic, 100g/60m) section dyed and leftovers and 1 skein of contrasting color thread. Kryusow No. 7, 2 buttons.
Back motif: Using a sectional dyeing thread, cast on 10 air loops and connect into a ring. Knit rows 1-7 of pattern 1.
Shelf motif (knit 2 symmetrically): Using a sectional dyeing thread, cast on 10 air loops and connect into a ring. Knit rows 1-9 of pattern 2.
Assembly: sew shoulders and sides.
Harness: Using a thread of a contrasting color, tie around the neckline and the shelves with single crochets. Tie each armhole in the same way.
Buttonholes: connect the threads to the place where the buttonhole should be, cast on 6 chain stitches, and a connecting stitch in the same place.
Buttons tie with non-woven columns behind the back wall in a spiral - 6 cm.

Video lesson
To crochet an openwork vest for a girl, you can use many diagrams and descriptions, or you can watch the detailed process on video - this will make it clearer, and things will go much faster.
Video lesson “How to knit a vest for a girl with your own hands”
Here's an option video of knitting a vest for a girl with knitting needles:
- 30 g pink and 50 g white yarn “ANGORA RAM” (40% mohair, 60% acrylic, 100g/500m);
- knitting needles No. 2.5;
- 3 pink buttons.
Patterns and knitting:
Facial surface: persons row - persons. P.; purl row - purl. P.
Elastic band 1x1: 1 person p., 1 p. P.
Sleeveless vest for girls knitting description:
Before: cast on 60 stitches and knit with a 4 cm elastic band, then the product is knitted using the technique enterlac in the following way:
basic series– triangles: triangle width 6 cm:
Purl 2, turn work.
2nd row: K2, turn the work.
3rd row: Purl 3, turn work.
Continue knitting, adding 1 st in each purl. p., until there are 6 stitches on the needle. Leave the loops of the first triangle on the right needle and start again from the 1st row to complete the second triangle. Repeat until 10 triangles are knitted.
A. Right marginal triangle. Knit with pink yarn. This triangle will become the basis for a series of rectangles.
1st row (front side): K2, turn the work.
2nd row: Purl 2, turn work.
3rd row: knit faces. behind the front and back walls of the loop, decrease 1 stitch with a slant to the left (connect this triangle with the next one on the left needle), turn the work.
4th row: knit purl, turn work.
5th row: knit faces. behind the front and back walls of the loop, knit knits. until only one loop of the triangle remains, decrease the loops with a slant to the left, turn the work.
Repeat rows 4-5 until you have worked all the stitches in the bottom triangle. Do not turn the knitting after finishing the last 5th row.
Rectangle. Start knitting the first rectangle. To do this, pick up 6 loops from the side edge of the triangle.
1st row (front side): Knit the cast-on loops, turn the work.
2nd row: knit purl, turn work.
3rd row: knit faces to the last loop, knit the last loop together with the first loop of the base of the next triangle, turn the work.
Repeat rows 2 and 3 until all 6 stitches of this triangle have been worked. Start with Row 1 to work the next rectangle. Knit the entire row of rectangles in this way.
Left edge triangle. Complete the row of rectangles with a side triangle.
1st row (front side): cast on 6 stitches from the base of the last triangle, turn the work.
2nd row: knit purl, decrease 1 stitch at the end of the row, knit 2 stitches together, turn the work.
3rd row:
Repeat rows 2-3 until 1 stitch remains. Secure the yarn and cut it.
 B. Rectangle. Now you proceed to a row of rectangles on the purl side. side of the canvas. Take a white thread.
1st row (wrong side): From the base of the triangle, use a working thread to cast on 6 stitches, moving down the side of the triangle, turn the work.
2nd row: knit faces, turn work.
3rd row: knit purl to the last loop, knit the last stitch together with the next loop of the next rectangle, turn the work.
Repeat rows 2 and 3 until you have worked all the stitches in the bottom rectangle.
When you finish a rectangle, do not turn the work, but proceed to knitting the next rectangle. Repeat until you have knitted all the rectangles in the row.
Thus, alternating pink (A) and white (B) rows, knit the front to the armhole - 12 rows in total, the last row is white. Next, you knit the rows of group (B) 2 times in pink and the rows of group (A) 2 times in white.
Then start knitting the neckline, to do this, use pink threads along the front side of the product to knit 3 rectangles (B), then 3 triangles as follows: insert the working thread into the base of the rectangle and pick up 6 loops, purl-wise. row, knit the last 2 stitches together, in knits. row, the last loop is knitted together with the next loop of the next rectangle. Repeat the procedure along the next 2 rectangles, the spaces between the rectangles are filled with triangles, and the top edge forms a straight line. Next, knit 3 rectangles (B). Then use white threads to knit 1 more row of group (A) and finish with triangles, as described above, only on the purl side. row you do not knit 2 stitches together at the end of the row, but knit in shortened rows. You have 18 loops left on your knitting needle on each side. Knit these 18 stitches separately on each side: 3 cm of the right shoulder - knit. satin stitch; 3 cm of the left shoulder - with a 1x1 elastic band, and in the 5th row close off for 2 loops of 2 stitches each and in the next row cast them on again. Then close the loops according to the pattern. Product length = 35 cm.

Back: cast on 64 sts and knit with an elastic band of 4 cm, then knit in stockinette stitch up to the armhole. For the armhole, on each side of the knitting, cast off 5 stitches once and then knit with stockinette stitch until the length of the product is 35 cm. You have 54 stitches on the knitting needle. Close off the first 36 stitches, and then knit 18 stitches of the left shoulder with a 1x1 elastic band to a height of 3 cm, then close the loops according to the drawing.
Assembly: sew the front and back along the right shoulder. Along the neckline and left shoulder, cast on loops (cast on in a pigtail) and knit with a 1x1 elastic band, after 1 cm from the left shoulder, make 1 more button loop. When the elastic is 3 cm high, close all the loops. Sew buttons. At the armholes, cast on 85 stitches and knit with an elastic band of 1x1 3 cm, close the loops according to the drawing. Sew side seams.
In the off-season, when the weather is changeable, a beautiful and warm vest for your children will be indispensable. Knitted with your own hands, it will be unique! A boy can wear it under his school jacket. For a girl, this original thing will be an element of a stylish look. A children's sleeveless vest with a hood is simply indispensable for walks and active games in the fresh air. An original knitted vest for a girl with knitting needles with a description, proposed in this article, can be made even for beginner knitters.
Vest for baby
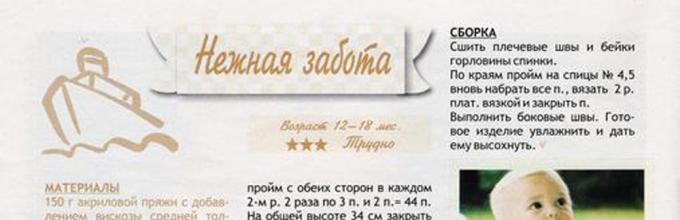
Calculations were made for girls aged 12-18 months.
Necessary:
- mixed yarn: white -50g, turquoise -20g;
- straight sp. No. 3;
- hook number 2.
Patterns:
- persons stitch: odd rows - knit, even rows - purl. P.;
- relief:
from the 1st to the 4th day, from the 6th to the 10th day, on the 12th day: persons. gl.;
5th row: *3l., 3p. remove before work, knit 3 p., then knit the removed 3 sts. * - repeat from * to * until the end of the p.;
11th row: *3p. remove at work, knit 3 knits., knit the removed loops k.* - repeat from * to * the entire row; - elastic band: 1 knit x 1 purl;
- scarf pattern: all sts - faces;
- buttons - 8 pcs.
Scheme of work
Before
We start with turquoise avenue. For a girl aged 1-1.5 years we dial 74p. and knit with an elastic band 5 r. Then we move on to the terrain. Knit 9cm and use white yarn for knitting. We knit 2 p. white threads. Next, for knitting a vest for a baby for 1-1.5 years, the following pattern: start with turquoise, 3 sts, then with white. In subsequent r. increase the number of sts with turquoise yarn by 3 sts. in every odd r. For a baby for 1-1.5 years. Knit 13 cm of total height and close symmetrically in 5 stitches. - armhole.
We continue the relief of 10 cm with an even canvas. Then we make the neckline: close the central 20p. Each shoulder is knitted from a separate ball. For a smooth neckline of a vest for a girl 1-1.5 years old in every even row. decrease 1 time 3 p., 1 time 2 p. Knit a 14 cm front (armhole height) and close the st. Knit the second shoulder in a mirror manner.
Back
In this model of a children's vest, the back is fastened with buttons. For children under 2 years old this is a very convenient solution. Let's make it from two halves. For one we cast on 28 sts on knitting needles. white yarn. Then knit 5 r. with an elastic band. After that - persons. Ch. all stitches except 6 stitches in the central part of the back - they are knitted with an elastic band. Knit 13 cm from the beginning of work and close 5 sts at the armhole. then - another 12.5 cm with a smooth canvas. For a baby 1-1.5 years old, close 10 stitches on the neckline, then in even rows. -1 time 2p., 1 time – 1p. The remaining points are straight. Having knitted the desired height (check with the front), close the shoulder section. We knit the second half of the back symmetrically, not forgetting to make buttonholes: we do the first in the 5th row, the remaining 7 pcs. – distribute evenly along the height of the vest. The height dimensions of the product are indicated for approximately 1-1.5 years. It would be correct if you measure the baby’s height and correct the numbers.
Assembly
Sew shoulder and side seams. To make a knitted vest look neater, lightly steam the seams.
Vest sleeves for girls 1-1.5 years old
From the middle of the front armhole to the middle of the back armhole, raise a st on the knitting needles in a white row. We knit in garter stitch, decreasing 1 st in each 6 p.
Decor
Crochet the edges of the sleeves and armholes with a sc stitch in turquoise stitch. Raise a white stitch on the collar along the edge of the neckline and continue with a scarf knot. On the 6th p.m. increase: every 6 p. plus 1 p. Knit with knitting needles 6 cm (for 1-1.5 years, this collar size will be enough, but you can increase it if you wish), close the stitch. Carefully hide the tails of the threads. If you were unable to choose the color of the buttons, do not be upset: they can be crocheted in turquoise thread. Sew on the buttons and lightly steam the product. A knitted sleeveless vest for a 1-1.5 year old girl is ready!
Children's tank tops knitted with various variants of the “Braid” pattern look very impressive. Cable knitting is suitable for both girls and boys clothes. It is better to make such a knitting pattern for children with thick yarn - then it will be more voluminous. We invite you to knit a sleeveless vest with braids for 4-year-old children.
Striped sleeveless vest: video master class
https://youtu.be/SxSC3ugAQCk
https://youtu.be/5PO_xzToV2s
https://youtu.be/WdgB2GGc6jI
Sleeveless vest with braids: diagram with description
Before
For children 4 years old, cast on 60 sts on knitting needles. and knit with a 4cm elastic band. In the last r. evenly add 9p. Then we knit all the loops using the description: 1 kr., 7 p., K1, 4 p., K3, 2 p., 1 l., 2 p., K3, 2 p., 1 l., 2 p., K3, 4 purl, K2, purl 7, cr. 1. We knit to a height of 25 cm from the beginning of knitting. We close it symmetrically on the sides for the edging in 7 stitches. and then - another 11 cm with a smooth canvas. We finish 3 cm of rubber bands.
Assembly
Sew all seams. For each armhole, raise 64p. and knit 3cm rubber bands. Close p. Lightly steam the product so that the pattern on the sleeveless vest for children looks neater.
Vest with a V-neck: video master class
Boy's hooded vest

 This model was designed for a 6-year-old boy. The product is knitted in one piece, with a simple pattern and is accessible even to beginner knitters.
Need to:
- mixed yarn of blue color - 100g, carrot color - 50g;
- straight sp. No. 4;
- zipper 40cm long.
Patterns:
- persons Ch.: odd p. – l.p., even – sign;
- elastic band: 1l.x1p.
Knitting pattern for a sleeveless vest with a hood for a boy
Cast on on carrot needles, 124 sts. and - 3.5 cm elastic bands. Change the color of the thread and l. Ch. – 19cm. Then we divide the work: after knitting 28 stitches, close 8 stitches, 52 stitches, close 8 stitches, 28 stitches. In the future, both halves of the front and back of the sleeveless vest with a hood are knitted from separate balls - see photo.  To form an armhole in even rows. perform decreases using the diagrams: 3 times 1 p. – symmetrically on both sides of the armhole. To decorate the neck, close off in 5 stitches. on both halves of the front of a sleeveless vest for a boy. In addition, for a smooth rounding, we gradually decrease another 7p. Tie the edges of the armholes with a carrot-colored elastic band.
Assembly
Sew the shoulder seams.
Hood
For children 6-7 years old, for a hood, it is enough to raise 72 sts along the edge of the neckline on carrot needles, departing from the center of the front by 5 sts. at both sides. Knit 2 cm l. Ch., evenly add 5 p., another 2 cm l. Ch., plus another 6p. on the volume of the boy's head. Next - l. Ch. Knit to a height of 26cm. Then change the color: 2p. blue, 4 rub. carrot, 2 p. blue, 4 rub. carrot, 1 rub. blue Ave. Close the loops. It is better to determine the desired height of the hood by trying it on so that the child is comfortable. For a boy 6-7 years old, this is approximately 33 cm. Sew the top of the hood using a loop-to-loop stitch. We decorate the edge with an elastic band: 16 rubles. blue Ave. Close the st., hem the drawstring. For the tie, we make a twisted cord of 3 threads and pull it into the drawstring. We sew in a zipper. A knitted sleeveless vest with a hood for a 6-year-old boy is ready!
Vest for 1 year old boy: video master class
Now, like last year, large designs on knitted clothes are relevant. A knitted vest for a girl will not be out of place in your child’s wardrobe. You can wear a vest or without it. A detailed diagram will help you knit the pattern.
The vest is suitable for a girl 4-5 years old.
We will need:
- yarn – 100% wool or wool with acrylic – 300 g. blue, 50 gr. white and a little green, in two thick threads
- knitting needles – 3.5 mm
Knitting the back
For the back, cast on 66 stitches, knit 2/2 rib (k2, p2) 4 rows. We continue to knit in stockinette stitch, while lowering 1 loop from each edge at intervals of 20 rows. This is necessary for the best shape of the vest. For the armhole, we knit 2 loops together at the beginning and end of the row in 6 rows. Then we knit without changing to the neckline. Next we leave 18 loops on the auxiliary needle, lower 10 loops, and knit the next 18 in this way:
Row 1 – no changes
2nd row – lower 1 loop from the neck side
Row 3 – lower 2 loops
4th row - lower 1 loop
Row 5 – lower 2 loops
6th row – lower 1 loop
Row 7 – lower 1 loop
After this, we knit 2 rows without changes. We got one shoulder. We do the second in the same way.
Before
We cast on 66 loops. Elastic band 4 rows. We continue with the stockinette stitch for 10 rows - without change. Starting from the 11th row, we begin to knit the Cat according to the pattern. We knit the eyes with green yarn.

In this case, we lower the loops on the sides, as on the back (in every 20th row). When knitted to the armhole, in the next 6 rows we knit 2 loops together at the beginning and at the end of the row. Next 14-15 rows without changes. Then we divide the loops into 2 equal parts (use an auxiliary needle). Next: cross 2 loops from the auxiliary needle with two loops from the main needle. We knit the loops on the main knitting needle, adding after the loops with the auxiliary one. We knit in stockinette stitch up to the neckline. We should have the same shoulders as on the back. We close the loops. We make a hood of the required size (take any of your child’s children’s items as a sample) If it’s difficult to figure out: a hood can be just a rectangle. The width of the rectangle is the neck of the vest: 2. We knit a striped hood: 4 rows of blue, 4 rows of white.
Sleeve
We cast on 36 loops, knit rows 1 and 2. In rows 3, 5 and 7, knit the first two and last two loops together. After this, starting from the 9th row, perform such decreases in each row until 4 loops remain. Close the loops. The second sleeve is similar.
Assembly
We tie the edge of the hood with a 2/2 elastic band. Sew the side and shoulder seams. Sew on the hood and sleeves. The vest is ready.

Blue vest Kitten
Warm vest for girls, knitted simply and quickly. The Kitten drawing serves as decoration. Age – up to 3 years.

We will need:
- yarn 50/50 wool + acrylic (70 grams dark blue, a little pink, white, black and gray)
- knitting needles number 3mm
- hook number 3 mm or circular knitting needles
Pattern: knit stitch: (row - knit stitches, row of purl stitches, etc.). Garter stitch: (in the beginning) knit stitch only. Knitting density: 22 loops / 26 rows = 10 / 10 cm.
Before
Cast on 72 stitches with dark blue yarn and knit in garter stitch, alternating: 2 rows of dark blue, 2 rows of pink, 2 rows of dark blue. Next we knit in dark blue stockinette stitch. At a height of 10 cm, in the middle, we knit a pattern according to the pattern.

Decrease 1 stitch on both sides in every 10th row = 66 stitches. At a height of 22 cm, for the armhole we close 3 loops on 2 sides, then in each 2 row 1 time 2 loops, 1 time 1 loop = 54 loops. At a height of 28 cm for the neckline, bind off the central 14 loops. We leave one half on the auxiliary knitting needle. To round the neck, close in each 2nd row 2 times 2 loops, 2 times 1 loop. At a height of 35 cm. Cast off the remaining 14 shoulder loops. The second side of the vest, which remains on the auxiliary needle, is knitted symmetrically.
Back
We knit as before, but without a pattern and not with such a deep neckline. To knit a shoulder at a height of 33 cm from the beginning of knitting, close the central 22 loops and knit each side separately. For the neckline, cast off 2 stitches in row 2. We knit the second side symmetrically.
Assembly
Sew up the side and shoulder seams. Tie the edges of the neckline and armholes with a crochet hook or on circular needles with an elastic band. Colors: 2 rows of dark blue, 2 rows of pink, 1 row of dark blue.
We embroider the cat's face with threads and sew on a bow. The bow is knitted like this: we knit a strip with pink yarn, pull it in the middle, as shown in the photo, and sew it on.


